
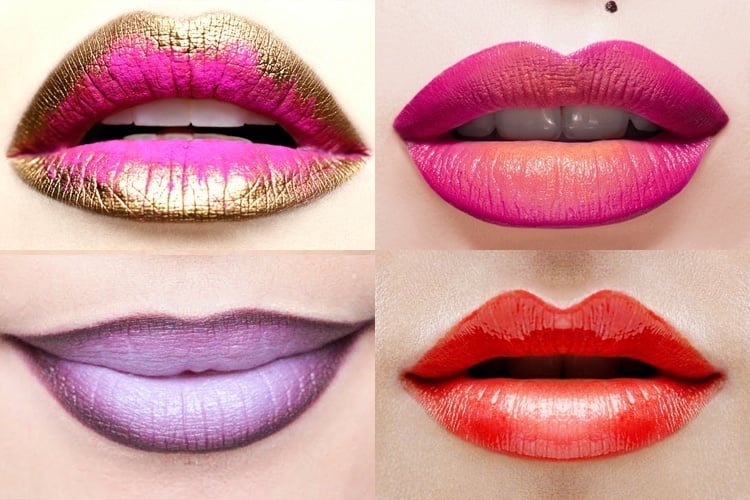
There is never an end to the fashion trend. Ombre is the recent buzz that is catching up fast. The trend shift has been from ombre hair to ombre nails and now ombre lips. Perfect for celeb parties to everyday occasions, ombre lips look buzzworthy since you can pick any colour combination and yet make it look superb with gradient effect.
[Also Read: Ombre Nail Art Design – Do It Yourself Now!]
Ombre in French means “shaded”, in short gradually fading colours. A couple of enhancements have made ombre lips so vast enough that you can create an impact by using different colours and changing tints.
Making ombre lips is largely done in two ways – by surrounding lighter lip shade in the centre with darker tones on the outside and vice versa. The gradual shading of colour starting from left to right of your mouth or upper lip towards lower lip gives you a diva like look which can get the whole world crooning over it. Today, various complimentary colours belonging to different colour tones and families have come about. Take a look at the step by step tutorial on how to apply an ombre lipstick perfectly!
How to Create Ombre Lips
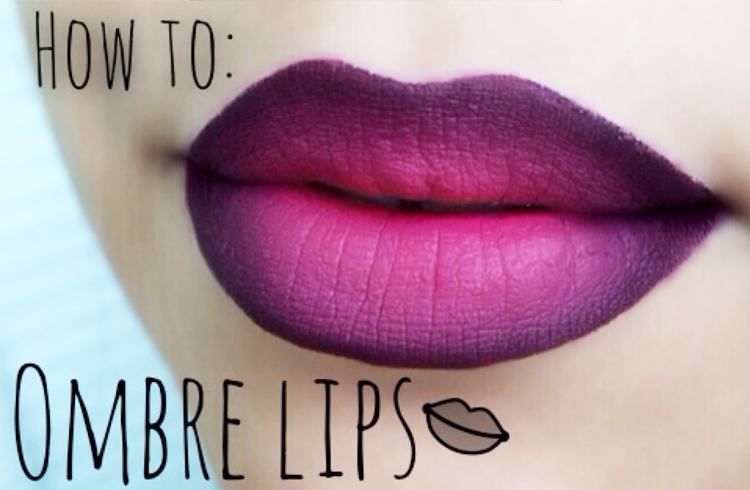
Source: ytimg.com
Choose Colours
The first thing you need to do is to choose the lip colours and accordingly match the costume you are going to wear.
Now pick two or more shades that you wanna frolic out with. In doing so, select the lip shade which shall be the outer, then the next shades (can be one or two) that would be towards the inner side of the lip. To simplify, you have to decide the shade you want to start with on the lip contours and the one to end up on the inside of the lips. Remember, the lip tint has to gradually change across the lips so as to give the impression of changing tones. That is when the full-bloodied impact of ombre lips comes out.
[Also Read: Re-Introducing OMBRE]
Mascara Brush and Concealer
Once you have done the lip colour selection bit (two/three/four, whichever), it is time to do the mascara brush in order to remove dead skin cells in and around the lips. Thereafter, use a concealer to make your fav lip shades vibrant enough.
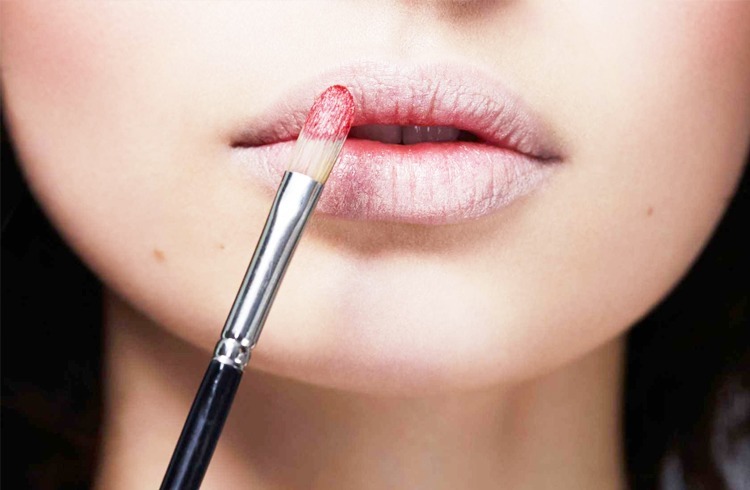
Source: hm.com
[sc:mediad]
Do the tints
Now that you are through doing the lip base, it is time to start applying the lip shades. Try and apply matte lip stick or gloss as they are best for ombre lips and lend a smooth application.
Line the edges
Get a pencil liner to line your lip edges and then follow it up by blending.
2. Whenever you are feeling any smudging happening, blot it with a tissue.
3. So what if you hate the mess up of lipstick, lip stains are not that bad either.
4. For a longer lipstick matte effect, try putting loose transparent powder on the lips then re-touch it with lipstick for a better impact.
5. While making a bold statement via the lips, make sure to keep the rest of your makeup mellowed down and low key. After all, you would want more attention to be on your lips, right?
So get prepared to look super duper cool, sassy, confident and every bit a glam babe by doing ombre nails. Your nearest competitor is the plain Jane you!