

We apologize for bringing up this post on princess cut blouse design late. After receiving requests from our readers, we finally decided to come up with an easy DIY blouse tutorial, especially for those who love stitching at home and customize their blouse designs. All the queries on how to make saree blouse at home, is explained below.
Since the princess cut blouse and the raglan style sari blouse are quite a rage these days, we picked the same for the tutorial. No matter even if your sari is mundane with less to no works on it, a great blouse design can instantly add glamor to your look, giving a luxury feel to your sari. Most Bollywood celebrity blouses also have princess cut blouse designs that go very well with sheer or net sarees that are see-through. These princess cut blouse designs can come in an array of designs and patterns. But let’s start with a basic princess cut blouse design tutorial.
For those who have hands on experience with their sewing machine, here is an elaborate drafting instruction on blouse cutting with step by step guide to make a princess cut blouse.
While making blouse designs, cutting is the most important thing. This not only gives a shape, but the fit and style also depends on the blouse cutting and patterns too. Do have a look!
Princess Cut Blouse Design Measurements
Length = 14 ½”
Chest = 36”
Shoulder = 14”
Waist = 30”
Sleeve length = 9”
Round Arm = 13”
Constructions

For The Princess Cut Blouse Back Design:
- (1-13) = ¼ waist + ½”
- (13-14) = 1 ½” or (1-2)
- (14-15) = ½”
- (16) = centre of (8-6)
- (17) = centre of (14-2)
- (17-18) = ½”
- (6-A),(13-B) & (15-C) = 1 ½”(for seam)
If U Want Sleeve Less Pattern In A Princess Cut Blouse Design:
(0-3) = 1/6 chest
[sc:mediad]
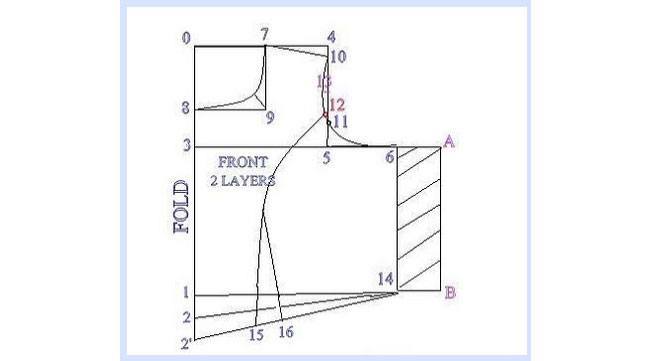
For The Front Profile Of A Princess Cut Blouse Design:
- (0-1) = Length + ½”
- (1-2) = 1 ½”
- (2-2′) = 1 1/2″ (in turn 1” and ½ “ for seam)
- (0-3) = 1/6 chest + 1 ½”
- (0-4) = ½ shoulder + ½”
- (4-5) = straight line
- (3-6) = ¼ chest + ¾” (for tight fitting – 1/4 ch+1/4″ (or) 1/2″
- (7-4) = 4” or 1/12 chest + 1”
- (4-10) = ½” down
- (8-3) = 1”
- (7-9-8) = front neck curve
- (11-5) = 1”
- (13) = ½”
- (1-14) = ¼ waist + ½”
- (2-15) = 1/12 chest + 1”
- (15-16) = 3/4”
- ( 12 ) = centre of (10-6)
- (6-A) & (14-B) = 1 ½” for seam

For Sleeveless Pattern Take This Measurement:
(0-3) = 1/6 chest
For Sleeves:
- (0-1) = length + ½”
- (1-2) = 1 ½”
- (0-3) = 1/12 chest + 1”
- (3-4) = 1/6 chest + ¾ “
- (1-5) = ½ Round Arm
- (6-7) = ½”
- (8) = centre of (0-4)
- (8-9) = ¾”
- (10) = centre of (8-4)
- (10-11) = ¾”
- (4-a), (5-b) & (7-c) = 1 ½” (for seam)

Source: pinterest.com
How to cut this blouse when the back draft 3 & 6, 1 & 13 measurements are not same if we calculate and draw?
From 6 to 13 is a slanting line. (3-6)= 1/4 chest + 3/4″
(1-13) = (3-6) minus 1/2″ (or) take waist round then, calculate 1/4 waist + 1/2″

Source: pinterest.com
Princess Line Directed From Neckline
- Go for darted sari blouse patterns: If you’ve selected raglan style for making princess line blouse then your first requirement is to go for darted sari blouse patterns
- Create back & front patterns: For this you’ll have to make paper patterns of both back and front bodices for a darted raglan style sari blouse
- Create seam: This pattern will also feature seam allowances. First cut off all the dart lines and then cut the waistline darts towards necklines

Source: pinterest.com
Back Bodice Pattern For Princess Line
- Create two parts: Back bodice is quite easy to obtain. All you need is to just cut off the extra dart allowance and separate the two parts
- Create the princess line: Now take the impressions on another pattern paper while adding seam allowance at the dart line so as to create the princess line
- Shape the neckline: Now mark the notches for joining and grains for cutting
- Take the front bodice pattern: For this you’ll have to stick all the darts except the waist line dart
- Create dart manipulation: The pattern you’ve create will now result in a 3-dimensional structure. This process of transferring darts from one place to the other is technically known as dart manipulation
- Trace the outlines: Now after getting the 3D structure, press the pattern over a pattern paper and traced the outlines
- Obtain the princess line: Since the darts are now manipulated into a seam line, you’ll now obtain your princess line
- Shape the neckline: Add seam allowance to the freshly cut princess seam and shape the neckline
- Pattern cutting: Mark the notches for joining and grain lines for pattern cutting
- Get the final font patterns: For this, you’ll have to cut the patterns. And your final front patterns for princess seam blouse are ready

Source: pinterest.com
Now that you have all the measurements and instructions, let’s take a look at some of the princess cut designer blouses. We are sure you would love them and want them for yourself.
Source: youtube.com
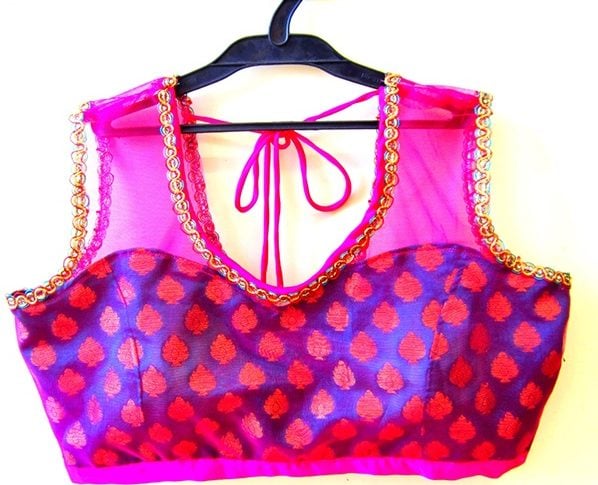
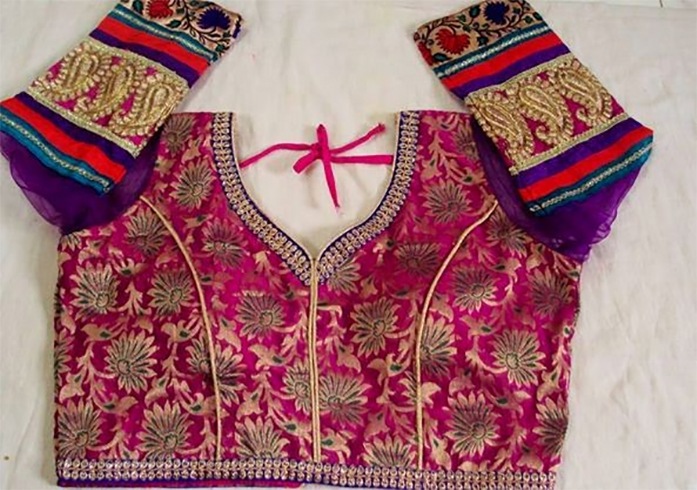
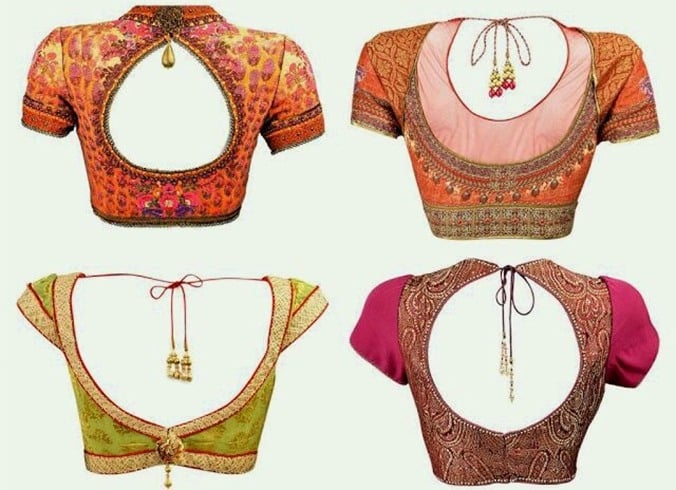
3. You will find a number of princess cut blouse neck designs. If you don’t want to experiment with the front, you can try some nice patterns on the back of your blouse.
Source: boutiquesareeblouse.com
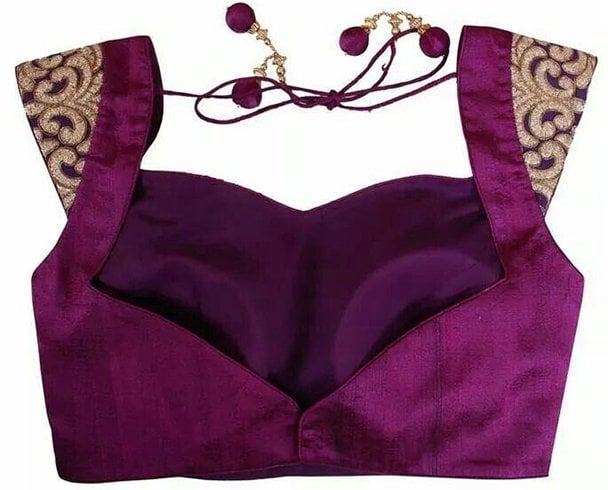
4. Try this unique princess cut blouse cutting. The unique pattern is sure to grab eyeballs.
Source: fashionpro.me
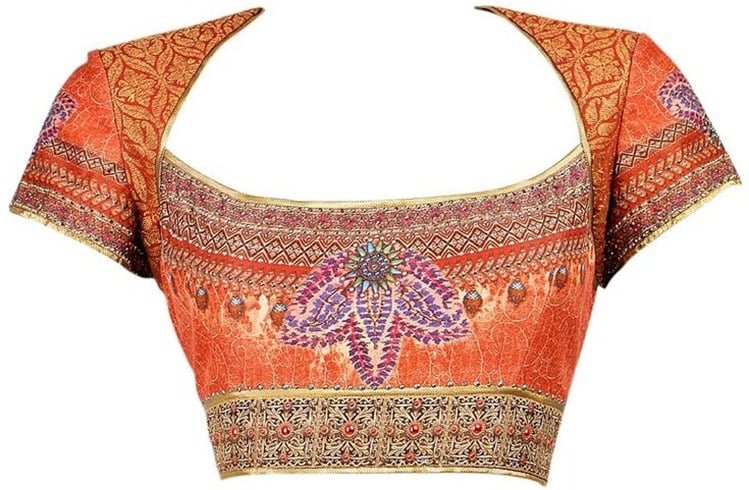
5. Your princess cut blouse measurements have to be accurate only then you can wear a beautiful blouse like this.
Source: blogspot.com
6. Princess cut blouses not only go well with sarees but can be paired with lehengas too.
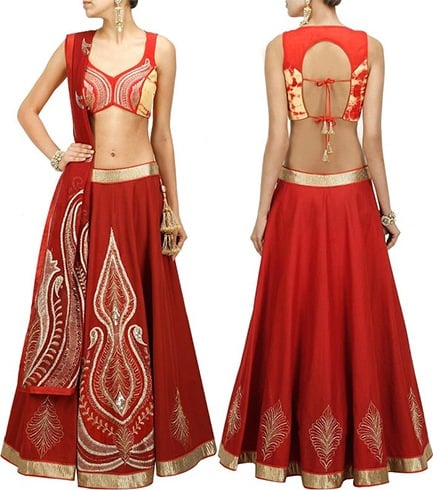
Source: pinterest.com
7. Choosing from the wide variety of blouse cutting patterns can be a tough task. Here is a design to make your choice a tad bit easier.
Source: pinterest.com
8. Ensure that your princess cut blouse drafting is done correctly. Here is a princess cut blouse design that you can get stitched to wear during the winter.
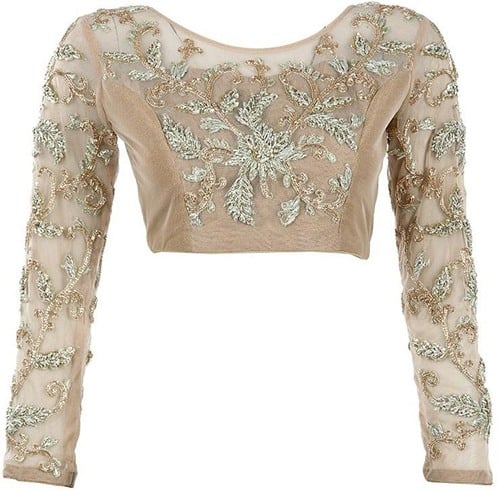
Source: beautyhealthtips.in
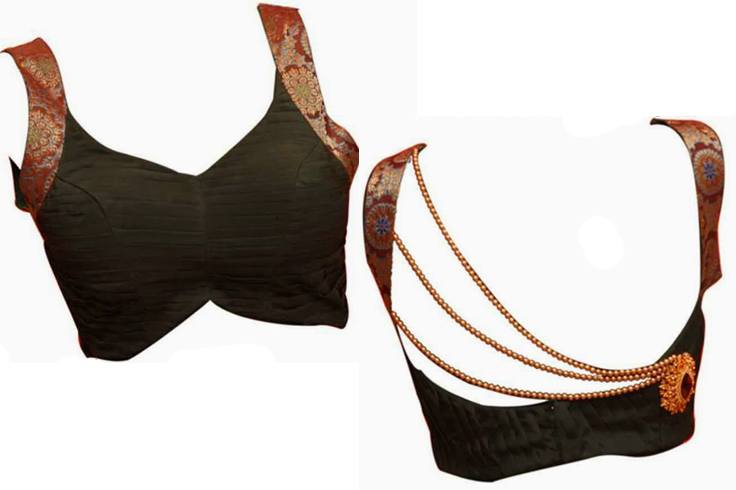
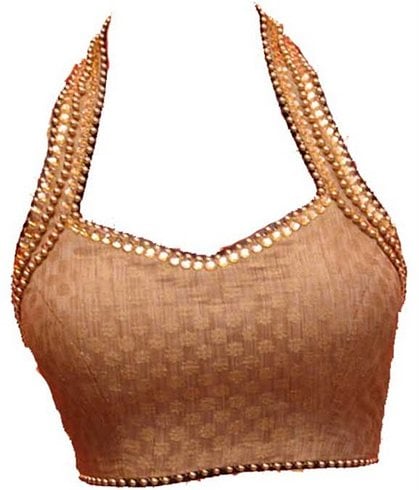
9. Try a princes cut blouse with different neck patterns. You can take inspiration from the below halter blouse.
Source: youtube.com
10. Check out these back designs that you try on your princess cut blouse patterns.
Source: ggpht.com
Hope this helps!
Do let us know if you have any doubts with your DIY blouse designs. Stay tuned for more such fabulous blouse designs and tutorials on how to make saree blouse yourself.
Recommended Articles
Brocade Blouse Designs
Net Blouse Designs: Sheer, Lace And Long Blouse Designs For Net Sarees
Boat Neck Blouse Designs
Maggam Work Blouse Designs
Designer Blouse Designs: From Jacket Blouse to Mirror Work Patterns
Zardozi Embroidered Blouses
Trendy Saree Blouse Designs And Patterns
Designer Blouse For Wedding in Winter
Backless Blouse Designs
3 comments
Thanks for the tutorial, I really enjoyed it. Regards
Hello,
I have a doubt.For front pattern(in the figure above), 1-2-2′ are joined to 14 . Do we need to cut from 2′ – 14? or draw parallel line from 2′ below 14 and cut ?
thank you
Good designs but it will be good if u could provide drafting instructions of princess cut blouse in PDF form.