
How many of you find it hard to store your jewelry in an organized way? Okay, it’s a common problem for us. Indeed. But, the fancy jewelry cases available in the market are extremely expensive. So, what to do? Well, think out of the box and go for handmade jewelry cases just by giving some simple things laying at the corner of your home, a cute makeover.
Source: pinterest.com
3 Most Amazing DIY Jewelry Box Ideas
Lets look at more Jewelry Box ideas
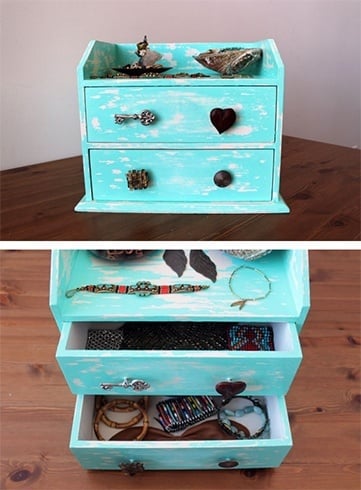
1. Vintage Wooden Jewelry Box
Supplies Needed:
- Wooden box (an old jewelry box or a desk organizer)
- Wall paint (shade of your choice)
- Top coat (polycrylic protective finish or shellac)
- Sandpaper (very thin grade)
- Wood filler (or wood glue)
- A few broken or left jewelry pieces
- Glue
- Screwdriver
- Wire cutter
- Some screws
- Paint brush
Steps to Follow:
- Prepare the box first by removing all unwanted pieces or extensions from it. You can take the parts off easily by using the screwdriver. It will create holes at places.
- Sand the box with the sandpaper to make the uneven edges smoother. Make sure that you do it around the perimeter of the holes too.
- Put wood filler or wood glue inside each of the holes to fill them up. Allow it to dry up completely. Then, sand the entire box once again.
- Now, paint the box. Go for only a couple of layers and leave overnight so that it dries up properly.
- Sand away the painted box very gently and carefully. It will chip off the paint here and there to give the box a weathered look.
- Seal in your desired look with a coat of shellac or polycrylic protective finish.
- Now, it’s time to decorate your jewelry box. For this, screw in a few screws to it tightly.
- Cut the chain or stick-like parts from your broken jewelry with the wire cutter and attach the actual jewelry pieces to the screws with glue. These will make the knobs for your box.
- Allow them to dry for the entire night.
- Voila!
Source: pinterest.com
[sc:mediad]
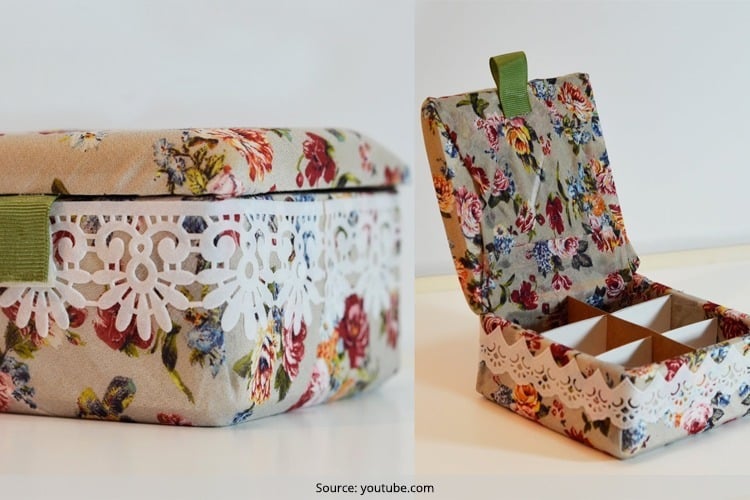
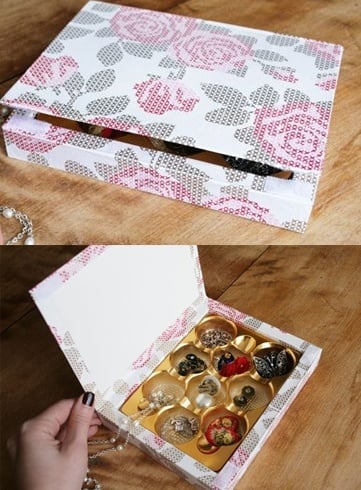
2. Chocolate Candy Jewelry Box
Supplies Needed:
- Chocolate candy box
- Beautiful wrapping paper of your choice
- Plain white paper
- Cardboard paper
- Tissue paper
- White acrylic paint
- A pair of scissors
- Paint brush
- Paper glue
- Water
Steps to Follow:
- Cut a sheet of plain white paper as per the size of the lid of your chocolate candy box and paste it onto the lid with the help of paper glue. Also, coat the sides of the box with white acrylic paint. These will prevent the actual color and prints from showing up through the pretty wrapping paper.
- Now, cut a large piece of wrapping paper, which can be used for covering both the lid and the backside of the box in one go. Make sure there is at least 1.5” extra in the edges of the paper so that they can be turned back.
- To cover the sides of the box, cut a considerably long piece of wrapping paper. The length and width of the strip should be enough for covering all three sides both externally and internally.
- Then, attach the wrapping paper strip on the sides of the box by using required amount of paper glue. Try to be as neat as possible, especially at the corners.
- Measure the inner side of the lid of the box and cut two rectangular sheets in this size from the cardboard paper. Glue them on the floor and the inner side of the lid of the box respectively.
- Prepare a thin mixture of water and glue and brush it all over the wrapped box. Also, press them gently with a tissue paper so that no air bubble remains in the wrap.
- You’re done with the most easy to make DIY jewelry organizer!
Source: pinterest.com
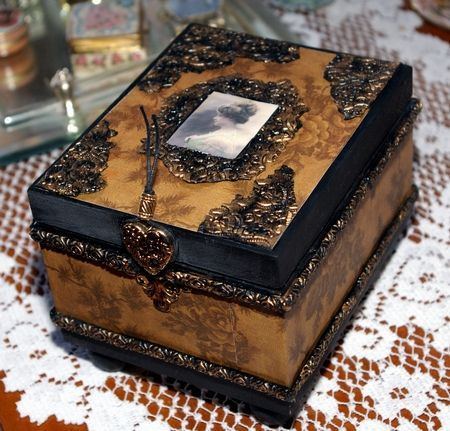
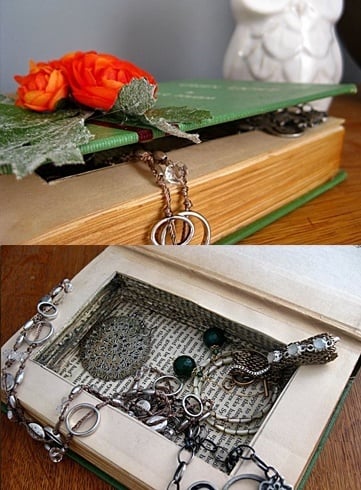
3. Old Book Jewelry Box
Supplies Needed:
- A large and thick old Book with hard cover
- X-acto knife or utility knife
- Sealing craft glue
- Paint brush
- Hot glue gun
- Pencil
- Silk ribbons, flowers or any other decorative of your choice
Steps to Follow:
- Flip the hard cover and open the book. Draw a rectangle on the first page with the pencil as per the shape of the book. There must be at least a 0.5-inch border all the way around the page.
- Now, start cutting the rectangle following the line drawn with the help of the X-acto knife. If your book is very thick, you may need to do it again and again until you reach desired depth. Do not bother if the pages of the book do not line up perfectly after cutting. It will actually add a classic touch to your jewelry box.
- Once you are done with the cutting work, start sealing the pages of the book. All you need to do is take every few pages as a bunch and apply craft glue to it (considering both the outer side and the inner side).
- Finally, decorate the top cover of the book by attaching the silk ribbons or flowers with it. Make use of the hot glue gun for this purpose.
- That’s all! You can make jewelry box designs depending on the thickness of the book and the type of decorations you wish to do on it.
Source: pinterest.com
Some More Innovative Ways To Make Yourself A DIY Jewellery Box
Need some more DIY jewelry box inspiration? Check out the following ones:
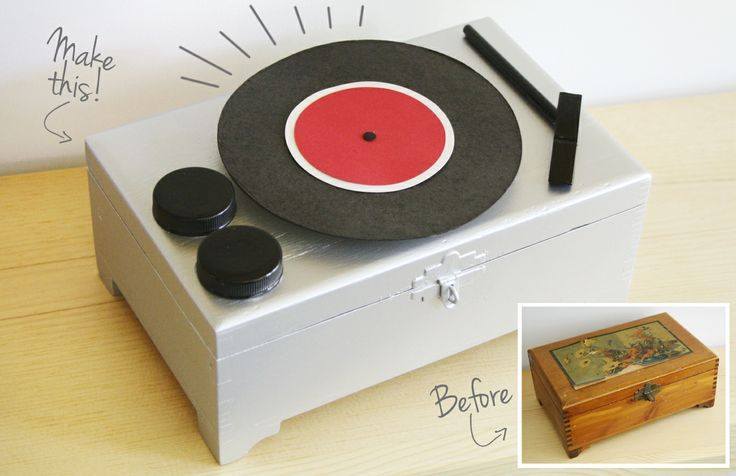
1. Record Player Jewelry Box
Source: pinterest.com
2. Stained Glass Jewelry Box
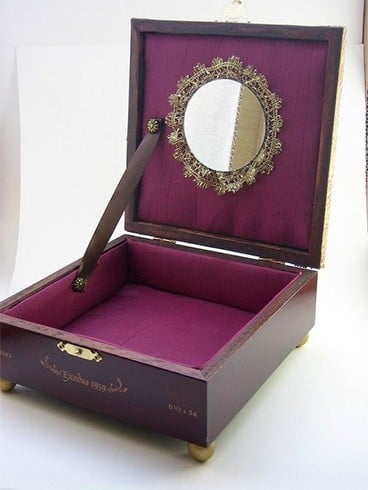
4. Cigar Jewelry Box
Source: pinterest.com
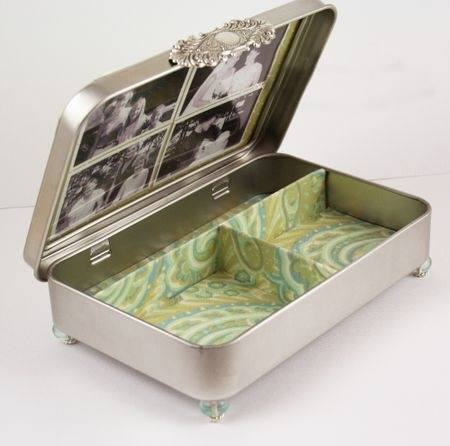
5. Altoids Tin Jewelry Box
Source: pinterest.com
Whoa! You have just made your own jewelry storage! This was fun, right? Now, fill it up with your valuable jewelry and feel proud of yourself! Thumbs up!
You have any DIY jewellery box ideas that you want to share with us? Drop a line below.