
Its just about time for Friendship’s Day and the excitement is already in the air. While most love celebrating friendship in their unique way, one thing that has been a ritual throughout is the “friendship band”. In case you’re wondering what to gift your BFF and want it to be simply exquisite, we have the best ways for you to make a lovely friendship band for your dearest ones and make them feel delighted this friendship’s day.
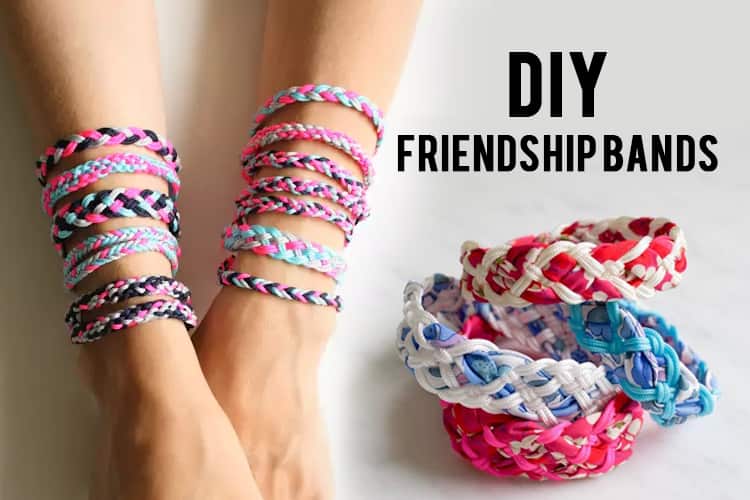
So while your friend thinks what to gift you, have a look here and learn how to make friendship bands or bracelets with lovely intricate designs. Check them out!
DIY Friendship Bands- How To Make Friendship Bands At Home:
Now that you are all set to make a friendship band for your friend, we have some easy yet extraordinary step-by-step instructions on how to make friendship bands at home. Go for it even if you’re a complete beginner, our steps will make you a pro.
1. Friendship Band with Embroidery Floss:
Friendship bracelets are an amazing craft to take anywhere! They are great for people who are fond of knitting and making crochets.
Method:
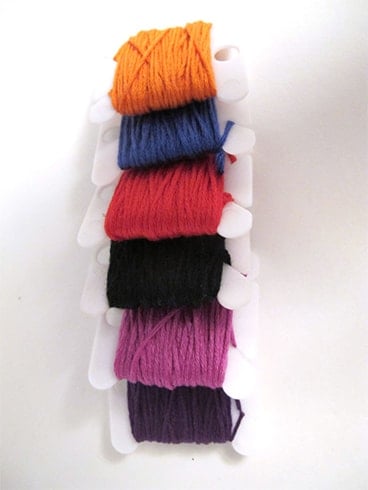
All you need to make this friendship bracelet is embroidery floss. In this tutorial, we’ll show you how to make basic friendship bracelets with candy stripe. You can easily learn how to create a friendship bracelet in less than an hour.
What You Need:
- Embroidery floss or thin yarn
- Scissors
- Tape or safety pins
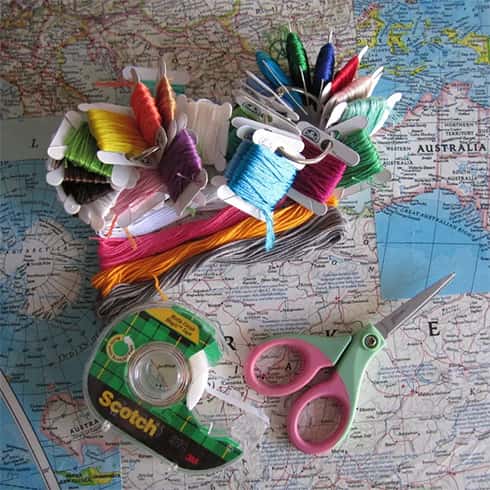
Source: instructables.com
Step-by-step Process:
- First, decide what order you want your strands to be in. This will help determine the order of the color of the rows.
- Once these strands are in order, take the first two strands. The strand farthest to the left creates the first row.
- Take the first strand and pass it over the second strand. It is essential to knot over the second strand.
- Next hold the second strand taut and pull the first strand up towards the large knot. Pull until you encounter resistance. This will thus create a small knot on the second strand.
- Create another knot by tying the first strand around the second strand again. Repeat the steps.
- Continue moving across to the right, and use the first strand to create two knots on each strand of floss or yarn in the bracelet.
- Once you have knotted all the way across to the right and reached the last strand of floss or yarn, start again by using the first strand on the left. Make sure that you are using two knots on each strand.
- Keep repeating until you have three to four inches of knitting done.
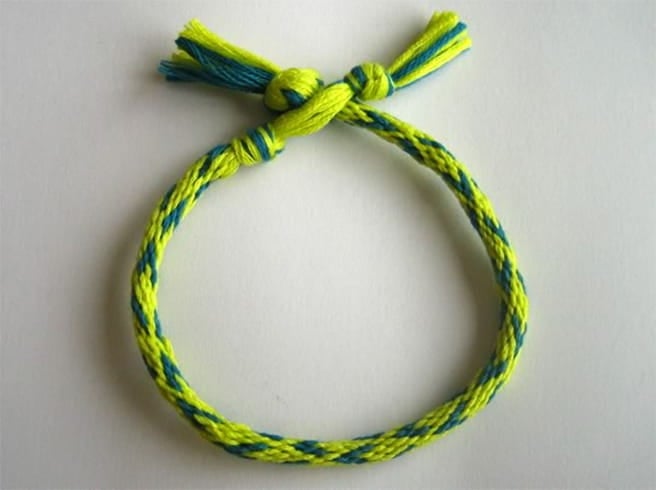
- Once you have got three to four inches of knitting done, you should be done with the bracelet.
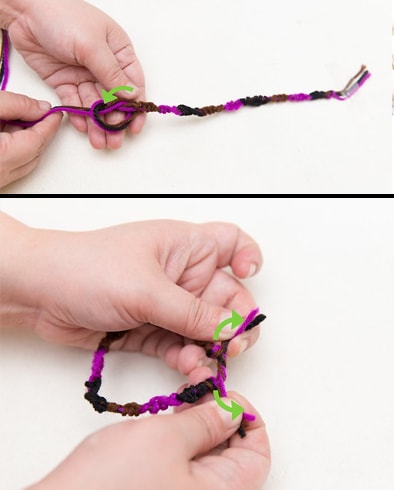
- Create another overhand knot right at the end of the main part of the bracelet. Create the knot and braid three inches. Then knot again.
- Next cut off the extra floss or yarn from both ends of the bracelet and you are done.
- If you have knotted your bracelet, it may tend to curl a little. To help prevent this, you may pin or tape it on a flat surface making sure it is pulled taut. Spray it using a good amount of water and allow it to dry.
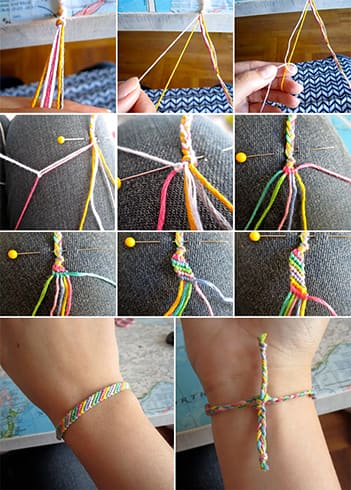
Source: instructables.com
2. Friendship Bracelet Using Charms And Beads:
Friendship bracelets made from colorful threads are a classic way to declare friendship. Gift them to friends or store them in your jewelry collection, they look fabulous anyway. To make one such bracelet, begin by learning the basic steps and add simple details like charms and beads.
Method:
Select as many strands of thread as you like. Opt for color combinations that would make a lovely pattern. Four to six strands can make a narrow bracelet and six to ten strands can make a wider one. The more strands you select, the wider the bracelet will be.
What You Need:
- Embroidery thread in several colors
- Pin
- Scissors
- Charms or beads
Step-by-step Process:
- Measure the length of the thread so that it is slightly longer from your fingertip till your shoulder and then cut it accordingly. This length of the thread is enough for the bracelet to stretch around your wrist to create a pattern.
- Tie the strands in a knot and pin them to a flat surface.
- You can also tape it to a surface or close it in a drawer. Pinning is a better option than taping as the pin keeps the bracelet from wriggling out of the proper position.
- Spread out the threads. Before starting to knot, spread out the threads so that the color is in an uniform order. Then pass the first strand over the second strand to tie a knot.
- Repeat the same steps using the same strands to make multiple knots. After you create the second knot with the first and second strand, you will need to use the first strand to create two knots in the third strand and so on.
- Begin the process again with the remaining thread. Repeat the double knot technique with the far left strand, moving from left to right until the strands are placed in the farthest right position.
- Continue until the bracelet is long enough to tie around the wrist. Tie the second end of the bracelet into a knot. Trim off additional string using a pair of scissors.
- Tie the bracelet together by tying the strands of the bracelet together. Add a simple braid.
- If you think your bracelet needs a little something extra, add some charms or beads onto the strands as you braid. Tie them into a knot and secure them.

Source: instructables.com
3. Friendship Bands with Braiding Loom:
This friendship band is among the few easy friendship bands designs that include a braiding loom and a round piece of cardboard with few slots that make the bracelet weaving process simpler.
- Embroidery floss-16 strands each 50 cm long
- One cardboard piece
- Scissors
- Glue
Step-by-step Process:
- The first step is to create the braiding disc. Select the pattern that you would like to create. Cut off the disc for the pattern. Glue the disc onto a piece of cardboard and cut off the excess. Poke a hole through the black dot in the center using a sharp tool. Lastly, cut off the black lines on the edge.
- Tie the first knot and gather your embroidery floss. Each piece should be 50 cm long. Line up all 16 pieces of floss and tie a simple knot. Leave about 2.5 cm at the ends.
- Set up your braiding wheel. Poke the knotted ends of the floss bundle through the hole in the center of the braiding disc.
- Braid your friendship bracelet using just three simple steps. Start by holding your braiding disc so that the start arrow points up. You will notice two threads at the top of the well. Unwrap the right-hand thread followed by the left of the three threads and clip it to the left of the thread on the top.
- Next, rotate the whole disk to the left so that the next pair of the thread is at the top. Repeat the same with the other steps.
- Continue braiding and after some time you will notice that the bracelet will grow through the hole in the center of the braiding wheel.
- Once the bracelet is long enough to tie around your wrist, unwrap it from the braiding wheel. Finish off by tying two knots next to each other.
- Your cute friendship band is now ready to wear!
Source: homemade-gifts-made-easy.com
4. Friendship Bracelet In Six colors:
Friendship bands such as this one are among the popular ones to gift your friends. You could ask them to stack it on their arms and flaunt them around this Friendship’s Day.
Method:
You may braid, stack, embellish, or exchange with your BFF, because these woven bracelets are everywhere. In this DIY, we will create a simple six colored friendship bracelet in a V-pattern.
What You Need:
- Darice embroidery thread
- Scissors
- Plastic bobbins
- Storage box (optional)
Source: crafts.tutsplus.com
Step-by-step Process:
- Select the various colors of thread you would like to use for making this bracelet. The embroidery thread or floss usually comes tightly wrapped. Loosen the thread and wrap it neatly around a plastic or cardboard bobbin for future use. Store the bobbins in a plastic box with compartments.
- Cut lengths of thread and unwrap thread from the bobbin. Cut the thread long enough to double the thread. A good length of each strand would be 284 cm. Trim off each colored thread in the same length as the first one.
- Fold all the colored thread in half. As you will be using six colors, you will have 12 strands altogether.
- Create a knot using all the strands which is 8 cm around and three inches below from the top of the thread. You can close the knot into the lid of your storage box to keep the thread.
- Organize your colors in the desired order. You can eventually make a V pattern with the stitches. Divide the thread in half, using six colors on the left and the same six colors onto the right. Repeat the steps using all other colors.
- Make a knot with your first thread. Start on the left side, then take your first thread and knot it in your second thread. Pull the tail of the orange thread through the center of the four knots to create the first knot.
[sc:mediad]
- Knot on the right side starting from the outer orange thread from right to left. You can then knot the orange thread using rest of the colors thus knitting twice each time to create the stitches.
- Complete the first V pattern when you are finished with the right side. Now create the two knots before knitting the two orange threads together. This can create the center point in the first V of the pattern.
- Then create the second V. Make use of your next outer thread color and follow the same steps as above. First, knot the red thread using all colors on the left and repeat the same with the outer thread on the right. Then knot the two red threads together to have your second V.
- Continue making the V patterns using each color. Once the length of the bracelet is long as you want, braid the threads together. To try this, separate the remaining threads into three groups.
- For the final step, cross your right group over the center. Then cross the left group over the center ground too. Repeat the same in alternate steps while crossing each of the outer group over the center group.
- Remove the original knot using fingertips. Cut the original loop in the center. Create about 5 cm braid at the top of the bracelet as you did at the bottom. Knot the ends and cut off the excess strands.
- There yo go! Your unique six color friendship band is ready.
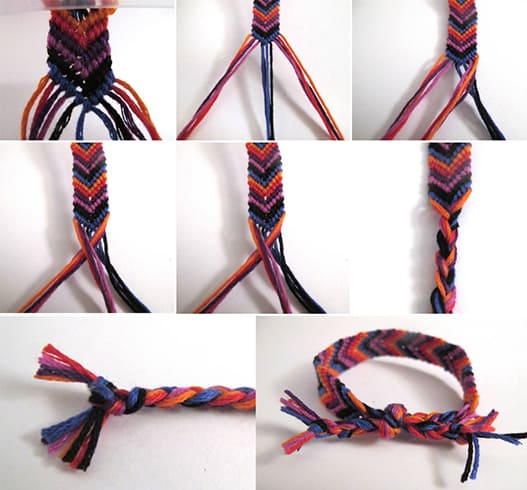
Source: crafts.tutsplus.com
5. Friendship Bands Using Simple Knots:
These friendship bands are made using plain knots with no complication of stitches. This DIY friendship bracelet design is simple and one should be able to master this in no time.
Method:
This is a great tutorial for beginners as the steps are basic and easy to learn. To start off, you will need a few materials.
What you need:
- Tape Measure
- Embroidery Floss
- Scissors
- Tape
- Safety Pin
Step-by-step Process:
- Measure the circumference of your wrist. Multiply this number by seven and trim off the embroidery floss to that length.
- Line up the strings side by side. Fold in half. And make a knot to create a small loop at the top.
- Tape or pin the loop to a flat surface.
- Place the leftmost string to one side while gathering the rest in one hand. Start by knitting the outer thread while creating a loop around the rest of the string. After making ten knots continue with the process by making use of different colored strings.
- Well, that’s it. You have a quick and easy friendship band to gift right away.
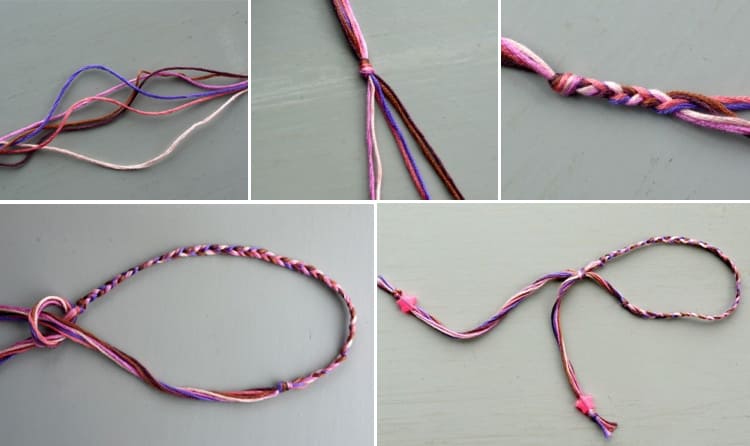
Source: thriftyfun.com
6. Friendship Band With Diagonal Pattern:
Friendship Bands Designs come in different patterns. One of them includes a diagonal design and they make a fabulous gift.
Method:
For a diagonal design, trim off more than 35 inches and knot each end to begin.
What you will need:
- String, yarn, or embroidery floss
- Scissors
- Tape or safety pin
Step-by-step Process:
- Anchor strings using a tape or pin.
- Loop the first string around the second string by pulling it tightly towards the top.
- Repeat the steps.
- Make use of the first string to create two knots each on the third, fourth, fifth, and sixth string.
- The second string should be placed on the end.
- Repeat the steps with all five remaining strings.
- And the friendship band is all ready.
Source: marthastewart.com
7. Friendship Band In Chevron Pattern:
For creating a friendship band with a chevron pattern, you need to loop the strings and arrange the colors so they mirror one another.
Method:
For creating a chevron patterned friendship band, begin with 70 inches of thread, folded in half. Then tie it into a loop.
What you will need:
- String, yarn, or embroidery floss
- Scissors
- Tape or safety pin
Step-by-step Process:
- To begin, follow the instructions mentioned to make a diagonal pattern.
- Then make a left knot for half of the strings. Repeat the same from the right side.
- Double knot the two strings in the middle.
- Again repeat the same from the right side.
- Double knot the two strings in the middle.
- Repeat the same for next row as well.
- This way you will be able to create a chevron patterned friendship band.
Source: creativecapitalb.com
8. Friendship Band In Chinese Staircase Design:
Want to make a gift for your pals? Give them a Chinese Staircase Friendship Bracelet made all by to your dear ones. Having one gift like this would be a feeling they would treasure forever.
Method:
Select different colors of embroidery thread and decide which one you would want to appear outside forming the main color of the design.
Source: wikihow.com
What you will need:
- String, yarn, or embroidery floss
- Scissors
- Tape or safety pin
Step-by-step Process:
- Finish loose ends by looping one string around all other strings or group of strings.
- Pull the knot tightly towards the top.
- Repeat the steps.
- As the spiral pattern appears, re-position the bracelet.
- To make a four-strand round braid, continue to the next step.
- You need not stick with using just three colors. You can also make a slightly thicker bracelet using more colors and designs.
- Braid the remaining portion of the string on both ends beyond the knot. And there you go, your Chinese staircase design bracelet is ready to be worn.
Source: marthastewart.com
Conclusion:
How did you like the Friendship Bands craft ideas? What designs would you like to try? And would you like to see more friendship bracelets in the future? Tell us what you think in the comments below.