
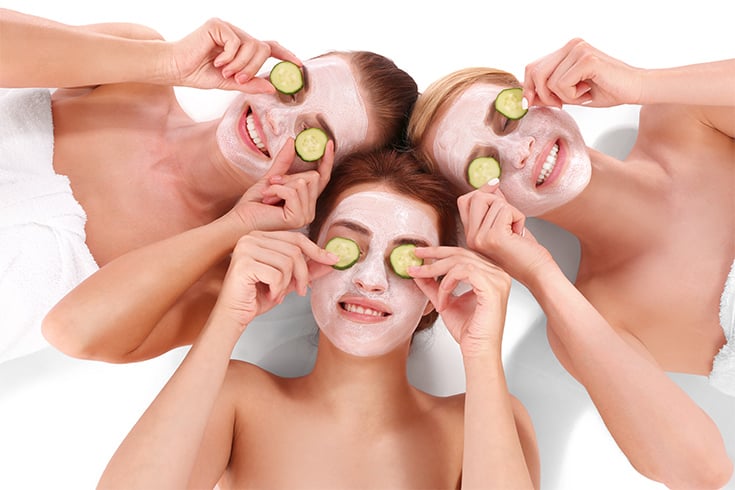
A facial is a must to do, should you wish to keep the youthfulness on your face alive. It isn’t a luxury as you may think, but a necessity that should be done once in a while. To be very honest, regular facials would be the best pampering treatment you could give to your skin- it also has physical and mental benefits too. Before we tell you more about the easy ways to do facials at home, here is the truth about facials. Read on please!
What is Facial ?
A facial is a multi-step treatment that includes cleansing, exfoliation and nourishment of the skin, thus resulting in a well hydrated, flawless complexion
A good facial done at home should include the use of toners, a massage cream or a lotion and a moisturiser. This will leave the skin looking youthful, glamorous and healthier. Isn’t that what you want? With that being said, let’s take a look as to why a facial is a must for you!
Why You Need a Facial:
Here are a couple of reasons as to why facials are so important for you. We shall talk about them in depth and make you understand the importance of facials. Please read on and be well-informed of the same.
Pore clearing
When you do facials regularly, the invisible pores are cleansed out and the dirt and grime is removed. This leaves the skin looking better and breathing better, and hence a healthy skin would have lesser breakouts and problems too.
Healthy complexion
Makeup can only do as much as it can to hide the flaws on your skin; healthy skin is what triumphs above everything and works wonders. This is why facials are important. While facial happens, steam gets into the pores, opens it and cleanses it thoroughly. It also helps calm and hydrate the skin too. All of this would lead to a healthier complexion as well.
You need lymphatic drainage
In a facial, you would need to have the right drainage done for the lymph nodes around the face. This helps the body relax and the skin to rejuvenate. Lymphatic drainage is promoted through facials, where the toxins are gotten rid off and the fluid retention around the face is brought down to a minimum as well. When the flushing out of toxins happen, there is better circulation. In turn, your skin would start glowing and you would look younger too.
You need deep cleansing
Deep cleansing facials are done so that the grime, dirt and the oil build up and the makeup remnants are removed. When proper cleansing is done, the skin on our face looks more refined. This improves the quality of our complexion and helps the skin feel light and refreshed too.
Beats stress
The rat raced lives we lead can bring in a lot of stress, and when we don’t know how to manage it, it shows on our face. You need to take time to pamper your skin and yourself, and a facial would help beat stress and bring back that balance too. Spend some time in a relaxed environment and get your facial done.
Beats ageing signs
Regular facials would help with cell rejuvenation and more. It also helps boost collagen and elastin production- aids to help with healthy skin balance and anti ageing. With every facial routine you undergo, your skin would be refreshed and relaxed, and works wonders on tired and dull skin too.
Helps with exfoliation
If you get facials done, the concept of exfoliation happens too. You don’t have to spend a bomb on fruit acids and microdermabrasion at a costly skin clinic, when simple facials at home can help start with cell rejuvenation.
Now that we have given you reasons justified enough as to why you should get a facial done, let’s take a look at the preparations needed.
What to do Before a Facial?
Before starting a DIY facial at home, you should know the following.
What are the products you would be using?
The products that you would be using should be known to you. What may work for dry skin or normal skin, wouldn’t work the same for combination or oily skin. This is why, choosing products according to the skin type is a must. And if there are skin concerns, always know which products would be best to use for skin that is sensitive. If you have been using a certain cleanser for some time and haven’t seen the results you desire, there are chances that the skin type and the product in use aren’t friendly to one another. This is why, knowing your products before getting a facial done is a must.
Never get facials before a big event
Never ever do facials before big events. You should schedule the facial aptly, and not forty eight hours before the major event. The skin would be fine, but then again, you shouldn’t be experimenting with a skin treatment right before the big event. You never know if the skin can handle the routine or not. And you don’t want to walk into the event with pimples and breakouts all over your face!
Do not wax or shave before facials
At least forty eight hours before you do facials, never wax or shave the skin. The products used in facials can have ingredients that can contradict the waxed or shaved skin, and cause stinging or tingling sensations too. There could be breakouts and tears in the skin as well. This is why, shaving or waxing at least forty eight hours prior to a facial is not advised.
Here we end with what to do before a facial, and since you are eagerly waiting to know of the DIY facial steps at home, please keep reading below for the same.
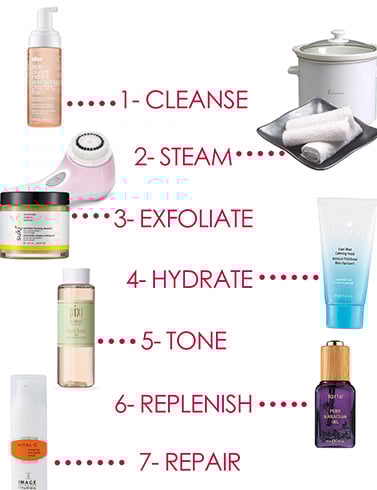
Here is the List of Facial Steps at Home by Yourself Naturally:
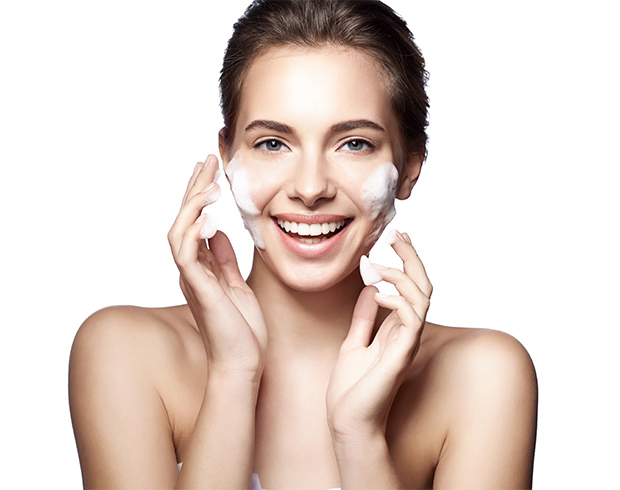
1. Cleanse:
Cleansing is an act where the pores are deep cleaned off the dirt and the grime that hide in the dermal layers of the skin, which we cannot see with our naked eyes, with the help of a cleansing cream, lotion or home ingredient.
Procedure:
- Make five to six balls of cotton
- Dip them in ice cold water and wring them out
- Take your favourite deep cleansing milk or lotion as per your skin type
- Apply generously on the cotton ball
- Start from the neck upwards
- Apply on the cheek and the chin in upward movements
- Gently dab the sides of the nose along the bridge of the nose onto the eyebrows going upwards
- Upward movements would be done for the same for the forehead too
- End with the cleaning of the area under the eyes and around the lids
- Repeat if the cotton shows more dirt- not more than twice
Tips:
The first cotton ball would have most of the dirt pulled out. If you feel there is more dirt on the face, repeat the action twice until the cotton ball shows itself as clean. Do not overdo!
2. Exfoliate:
Think of exfoliation as digging out the debris. The debris here would be dead skin cells, oil and dirt, grime and remnants from elements around, makeup too. Exfoliation removes all of that, and helps open the pores further.
Procedure:
- Get a bowl of oatmeal
- Half a cup of whole milk
- Mix the two and form a gooey paste
- Apply the same on the face, the neck and the forehead
- Wait for ten minutes
- Gently wash under cold water
- While washing is being done, use gentle upward motions on the neck and the forehead, the chin and the cheek too
- Wash thoroughly
- Pat dry
- Do not repeat
Tips:
Never do this step more than once. The layers of the skin gets cleansed and thin. You do not have to exfoliate forever to get the invisible remnants out.
3. Steam:
To further ensure that the skin pores are cleansed, the best way to do the same would be to steam the face. For even skin that is sensitive and acne prone, you can use steam, which helps decapitate the pus and comedones.
Procedure:
- Start by filling a large bowl with boiling hot water
- Place lemon pieces in it
- Grab hold of a towel which is clean and light weight
- Wear the towel as a tent over your head
- Hover your face over the boiling hot water at twelve inches length
- Gently inhale and exhale the steam vapours
- Allow the steam to touch every part of the face and the neck
- While this happens, do not touch your skin
- Remove the towel after ten minutes
- Wipe off the sweat and oils from the face
Tips:
Do not do this step more than once. For ten minutes only and not more than that should steaming be done. However, if you feel claustrophobic or uneasy, you may stop steaming when five minutes are over.
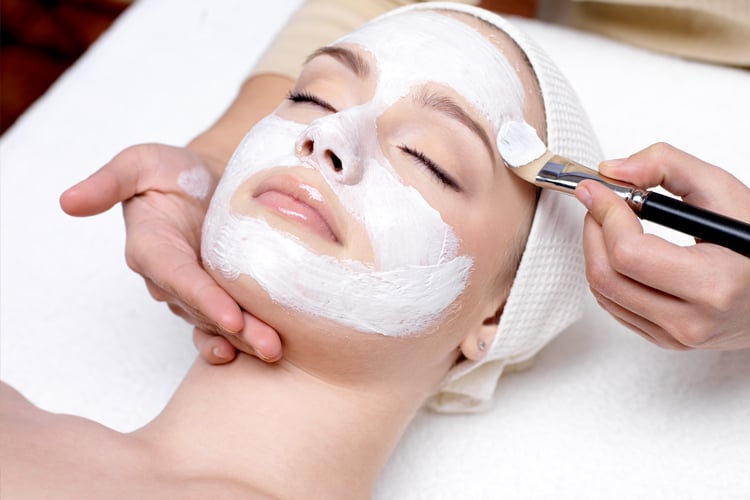
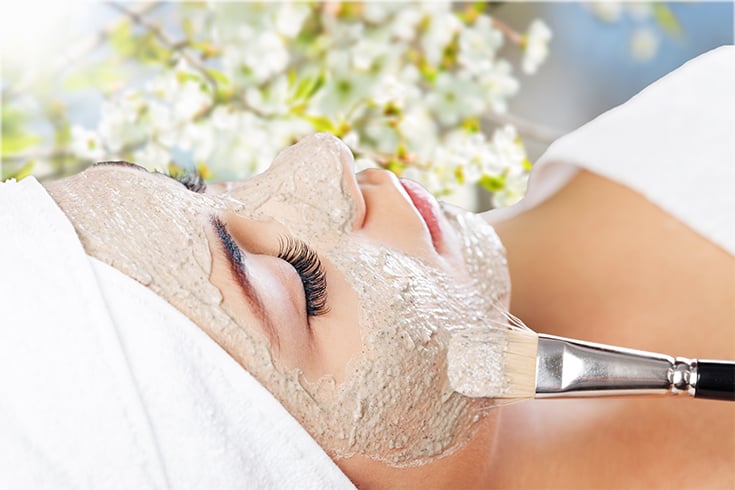
4. Apply a Facial Mask:
Now is the time to apply a facial mask. You can make your own at home with the help of ingredients found in the kitchen. Here is one for all skin types. This helps balance the skin oils and the pH levels of the skin.
Procedure:
- A tablespoon of lime juice
- A tablespoon of honey
- A tablespoon of gram flour
- Mix them all well in a blender and form a gooey paste
- Apply the same on the face, the neck and the forehead and wait for ten minutes or until it dries.
- Wash off with cold water
- Pat dry the skin
- Moisturize thereafter
Tips:
While you apply the mask, don’t forget the use of gentle circular motions on the skin. If you have thyroid, the neck area should be massages anti clockwise.
5. Massage:
While the face pack is on and the consistency is still gooey, this is the time when the massage should be done.
Procedure:
- From the neck, the massage should go upwards towards the jaw line
- From the jaw line the massage strokes should go upwards towards the temple area
- From the chin, the massage strokes should go towards the lower lip
- A slicing stroke done thrice on the area between the upper lip and the nose bridge is enough
- For the cheeks, the massage should be circular and towards the outer corner of the eyes
- For the outer corner of the eyes, zig-zag finger movements should be done
- For the nose bridge, form a circular motion of number eight. Start from the end of one side of the nose, all the way up to the brow area, travel the brow area and end at the outer corner of the eyes- do this thrice.
- For the forehead, the massage strokes should be done upwards and outwards towards the temple zone.
Tips:
Be gentle and don’t rush these eight steps—thrice for each zone is a must.
6. Tone:
Once the massage is done, allow the pack to dry and then wash off the face with cold water. This is when the pores would be open, and keeping them that way is not advised. Toning thus is a must, and you would need to use the right toner ingredients for the same.
Procedure:
- Overnight soak rose petals in a glass of ice cold water
- The next morning, strain the water
- Collect the water and pour into a spray bottle.
- Spray the mist of rose water onto your face generously
- Allow it to dry off naturally
Tips:
Do not touch your skin when the toner is being put or after the massage. The pores are open and it could lead to infection.
7. Moisturize:
Once the toning is done, the pores have shrunk and the skin tone evens up. This is when you should apply moisturizer, which helps balance the pH levels of the skin.
Procedure:
- Take your favourite moisturiser
- Add a few drops onto the tips of your finger
- Gently massage the face and the neck as you did in the facial massage
- Wait for ten minutes
- Use a dry cotton to wipe of the excess
Tips:
Always use a moisturizer as per your skin type.
So these were the ways on how to get a facial done the right way at home. Now that the facial is done, let us take a look at the next steps- what to do after a facial!
What to do After a Facial?
The reason why we have facials done is to raise the health of our skin and make it healthy. There is after care to manage when facials are done. Without the right care, the pollutants and grime, dirt and oil would be back setting up shop. So here are the things you should do, after a facial to keep it that way!
Take hydration steps
We cannot stress and emphasize on this point enough. One has to stay hydrated always after getting facials done. This helps keep the glow on the skin alive for a longer period of time. Staying hydrated ensures the flushing out of toxins too. In turn, your face stays clearer and brighter, and the complexion would glow too.
Do not touch your face
When you touch your face which has just been pampered and treated, you would be bringing more bacteria and dirt from your hands onto the face, which can lead to infection and breakouts. Post facial, skin is sensitive for the moment, which is why no touching should be done.
Stay out of the sun
Following a facial, at least for the next few hours we would advise against going out into the sun. You don’t need a dose of vitamin D at the moment, since the skin now would be extra sensitive and can have damages done to it because of the harmful UV rays of the sun. If in any case you have to go out into the sun, using an SPF with moisturiser is a must.
Don’t use makeup
For a little while, avoid all makeup and cosmetics to use on your face. This is because, the skin pores have been thoroughly cleansed and now are bouncing back to normalcy. If you apply makeup on the skin at this moment, it would block the pores. Blocked pores are going to be heavily damaged, and there would be breakouts. Moreover, whatever you put on your skin now would go deep into the epidermis layer of the skin and stay there. This could cause more infections. After a couple of hours though, you can apply makeup as usual.
Don’t wash your face for the day
For around twenty four hours post a facial, do not wash your face. Never use a face wash, a scrub or a soap. This is because the face is already cleansed and hence anything touching the skin now would lead to eruptions. Moreover, since the skin is ultra sensitive at this moment, the chemicals in soaps and face washes can further irate the skin. Give it is a day for the skin to recuperate and then wash it with your favourite face wash.
Don’t sauna or massage the face
Your skin has just been treated, which is why it should be left alone for a day to bounce back to normalcy. Your skin now is malleable, and getting a sauna steam treatment or a massage done would make prints on the skin. And heating the skin further would strip the glow it has got from the facial you just did!
Moisturize
Moisturizing is important, even if the skin is of an oily type. This helps balance the pH levels of the skin and brings back the moisture levels to normalcy too. What you should ideally use would be a lightweight moisturizing cream. You can also use a fragrance free and a non-comedogenic moisturiser too.
With this, we end with the tips on after facial care. Now let us take a look at what to expect when a facial is done and over with. Would there be a sparkling princess glow?
What to Expect after a Facial?
Now that you have got your first facial done at home, here is what to expect.
- There could be breakouts but there is nothing to worry. Don’t be confused when the breakout happens once the facial is done. Sometimes a breakout can happen after a few days; this is a detox happening and there is nothing to worry. This is the time when the debris on the skin is being expelled. You may see pimples, zits and bumps, and this would be normal to happen.
- There are no down times with any facial as such, and the redness or irate skin you see on the skin would be normal. This is normal, since you have exfoliated and extracted the dirt. Don’t worry about the redness, it shall go down in a couple of days and don’t even touch that area.
- There are a variety of reasons as to why the skin may dry or turn red, so there is nothing to worry. Why this has happened is because the skin area where the massage was done was activated and now is relaxed. The skin was worked upon and hence it needs time to come back to normalcy.
- A few spots and blemishes on the face would also be normal, which wont last for more than a day. However, if you see anything lasting for more than a week, it would be time to check with an aesthetician.
Here was what to expect after a facial. Now let’s take a look at what should be done post facials.
What you should be doing Post Facial
When a facial is done, the skin has gone through deep cleaning. This is not the daily sort of cleaning that you do every day, but an experience quite different. Here are things you should be doing after the facial.
- On the same day as your facial, don’t do your night skin routine
- Don’t exfoliate for at least three to four days
- Regular deep cleansing can be done three days later
- Only use products that can be best for your skin type and condition
- Drink plenty of water
Now that we have a better understanding on what to do after a facial, here are a few facial tips to adhere to.
Tips for Facial :
- Get a consultation done by an expert aesthetician before you do a facial. You should tell the expert about the skin type you have, skin disorders if any, the diet you follow, how much water in a day you consume, if you are on any medications or supplements, if there are any drugs you use et al
- Always wear loose clothing when getting a facial done, so as to be at ease. You could just wear a bra and do your facial, when alone. One could also wear Velcro and wrap around the chest too.
- Wrap your hair with a towel or a headband, and this will help keep the product out of the hair.
- Clean cotton pads should be used, which should be damp and clean.
- Analyse your skin before you start cleansing the skin. Only when you know what your skin type is, you would know which products to use.
- Steam should be used to relax and open the face pores. This helps soften the blackhead and the whiteheads, and extraction would be easier. However, steam is not to be used for sensitive skin.
- When you exfoliate, do it right after the steaming is done. Be gentle with the treatment, since it is a step to remove the dirt and the grime.
- When extracting blackheads and whiteheads, only do so if you need it. Extractions are painful, and if you cannot tolerate the pain, do not do it. If the skin is ruddy or thin, don’t opt for extractions, or it can cause broken capillaries and cause discoloration of the skin
- Classic strokes such as an effleurage can be done for relaxation and the stimulation of facial muscles and the skin
- When using facial masks, use one which is apt for your skin type.
- Once the cleansing and exfoliation is done, don’t forget to tone the skin and to use moisturizer after that.
- Once in a month, get a facial done at home!
Final Words about Facial
There are various facials that can be done at home, using ingredients found in the kitchen. It also depends on the skin type and the reason why you want to do a facial; some want an extra glow, while others want anti ageing. Some want more oxygenated touches to their skin, whilst others look for a clean-up. Whatever be the reason for you having a facial, remember to do it once a month as a necessity.
Disclaimer: If you do not know which facial at home would be best for your skin type or your skin condition, it would be best to not experiment around. Speak to your skin specialist or a skin aesthetician for the same and then proceed with their advice. What we have spoken off here is for informational purposes only. The experts advise would any day take precedence over what is written here and elsewhere online.
Stay gorgeous always and get your facial appointments booked today!
Recommended Articles:
Egg White Masks For All Skin Types
Homemade Face Packs To Get Instant Glow
Bentonite Clay Mask Recipes
Fruit Facial At Home With Dry Fruits
1 comment
How can I do gold facial at home?