When you buy soaps off the shelf, it is due to the impact of the product’s advertising. But, how do you check the quality and skin-friendly aspect? That’s a tough call! It could mean that it is now time to make a switch to handmade soaps. The beauty of it is that you choose your own ingredients and fragrances. Only the making needs some practice. That’s all.
So, here I go sharing with you tips on how to go about making handmade soaps.
Here Is The List Of Natural Homemade Soaps:
Here are those 8 natural handmade soaps which will give you and your skin immense joy and satisfaction:
1. Lemon Soap
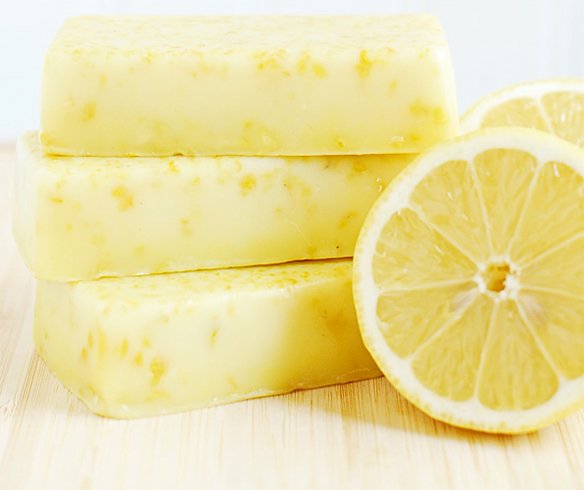
Know the smell of citrus scent? Handmade lemon soap gives you the exact properties and texture – it leaves you feeling rejuvenated. In fact, such is the citrus scent in homemade lemon soap that you don’t need to add colorant to it.
Ingredients:
- One and half cup Shea Butter Soap Base or Goats Milk Soap Base (cubed)
- 4 to 6 drops lemon essential oil
- Lemon zest of 3-4 dried lemons
Equipment:
- Soap molds
Tutorial:
- First of all, cut the soap into cubes and then microwave it in an interval of 30 seconds. BTW, this soap gives you the benefit of 3 soap bars.
- Melt soap for about a minute. If it hasn’t melted fully, then give it a time of 15-30 seconds more.
- When the soap cubes have turned into liquid, put in a few drops of lemon essential oil and the lemon zest. Stir it well.
- Now is the time to pour all of this into soap molds. You need to give it a lead time of 1 hour for it to harden up.
- To release soap, press the mold.
Best suits for: Acne skin

Source: apumpkinandaprincess.com
2. Pumpkin Soap
This is a Cold Process homemade soap recipe. Pumpkin, by nature, is full of fruit enzymes, antioxidants, alpha hydroxy acids and vitamins A and C – all of which keep your skin youthful and refreshed.
Ingredients:
- For ‘Liquid & Lye’ Portion, you need 119 gms of Lye, 227 gms of distilled water
- For ‘Oil Portion’, you need 454 gms of Lye; 227 gms of coconut oil; 85 gms of sunflower oil, and 85 gms of cocoa butter
- 2 ounces of canned pumpkin
- Vanilla spice layer
Equipment:
- Small plastic container
Tutorial:
- Pour 1/3rd of the batter in a small plastic container (you can also use a recycled yogurt container)
- Now blend in 1 tsp of vanilla absolute, and 20 to 30 drops of clove essential oil
- Pour half of the pumpkin soap into the mold lined with parchment paper.
- Then add the vanilla spice layer, and then on top put the balance pumpkin soap
- Cover this and let it lie undisturbed for 3 days at the max
Best suits for: The fall season
3. Pure Coconut Oil Soap:
The coconut oil soap is high in superfats so it gives you a dense lather when you rub it on skin. Want a light bubbly and lathering effect? Then get yourself a natural sponge in handmade coconut oil soap.
Ingredients:
- Coconut oil
- Lye (or Sodium Hydroxide)
- Water
- Essential oils (optional)
Equipment:
So how did you find the very concept of handmade soaps in the first place? Do write in, and share with us more of the handmade soaps that you use and are close to your heart.
Recommended Articles:
Easy Homemade Conditioners For All Hair Types
Homemade Mouthwash Recipes
DIY Lip Balm And Lipstick Recipes
Homemade Sunscreen Recipes

2 comments
how to make soap at home without lye?
Cut the soap into small cubes and melt it in a pot. Add coloring one drop at a time while stirring and melting the soap to achieve the desired colour. Now add the essential oil.Add other ingredients you’d like to, and pour the paste into soap moulds. Let it cool for 24hrs after which allow the moulds to air dry.