About Soutache:
Pronounced as ‘soo-tash’, Soutache is also called the ‘Russian Braid’. Soutache as an art form or a craft form was developed way back in the sixteenth century and is a part of the French passementerie form. It includes a wide range of braids and trims, and tassels too, which are used as embellishments on draperies and in haute couture, and furnishings too. The ‘Galoons’ need to be made first, which are most often seen on uniforms worn by military people. They are swirls of Soutache that are stitched flat. While doing the Soutache embroidery with beads one needs to stack the lengths to create a solid visual impact and to ensure a solid base is in place to add more beads. Soutache embroidery does not have to be straight. It can be shaped into patterns galore, curved and more; it is a textile essentially. Talking about the threads and the trim used to make Soutache, there are various colors it comes in. Most of them are made from natural fabrics, examples silk and wool. But there are Soutache dresses that are made from metallic threads, semi-synthetic fibers, and synthetic fibers too.
Different Soutache Crafts:
Tunics and cotton kaftans in most cases have had a touch of Soutache embroidery. They have been worn traditionally by people from across the globe- West Africa, Russia and from Morocco too. If you take a close look at the Mariachi uniforms worn by the Jalisco (Mexican musicians), you would notice how colorful and vibrant they are; thanks to the Soutache braid work designs and Soutache embroidery patterns embellished on them.
It was in the mid-1800s when Soutache (a French word) came into being. It originally comes from the word SUJTAS, a Hungarian word- meaning braids used for trimming. Galloon is another word for Soutache, which has French origins from the sixteenth century- derived from the word GALLOONER, which means to adorn with lace or to embellish.
When you take a look at the threads in Soutache embroidery, they come in various hues and shades. Most of them are made from very natural fabrics- wool and silk. There are some that are made from synthetic and semi-synthetic fibers too- rayon and metallic threads, gold, and silver threads as well. While the military styles are going out of vogue, the braids which are so decorative can be seen embellished on jackets, coats, epaulets, fabrics and on the garment shoulders too.
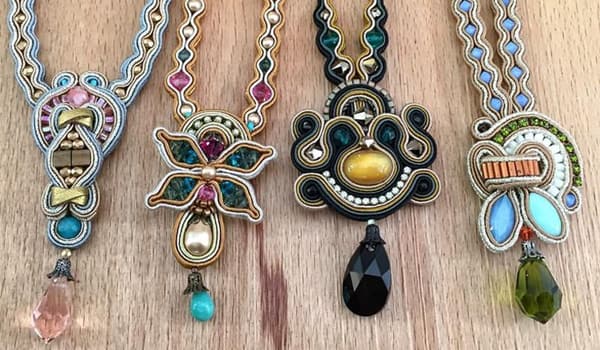
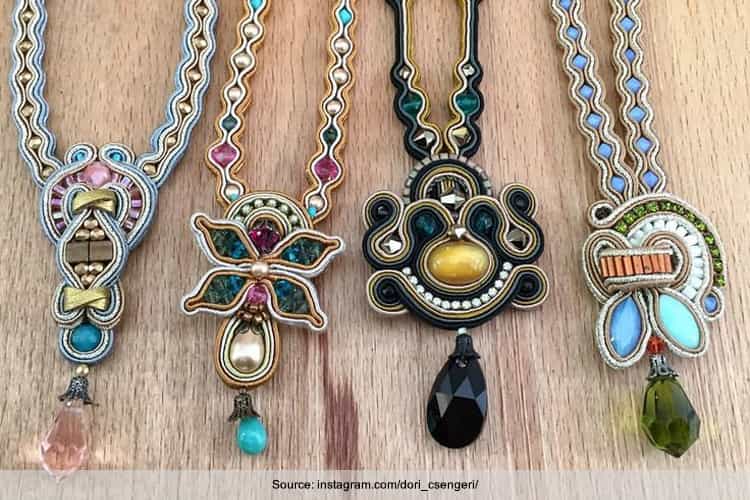
The best application of Soutache is when one uses the DIY Soutache designs to create and curate jewelry. The swirls and loops and even the beads, they all combine to bring forth a colorful and a very lightweight piece. Each of it is stunning and unique. Soutache jewelry, such as DIY Soutache earrings are lightweight and resembles a piece of clothing well made-conforming very well to the body of the wearer.
There are artists that work on Soutache and bring about a colorful explosion of creative imagination and craftsmanship. And there are those that work with Soutache to bring one of a kind elegant pieces. Irrespective of your personal taste and style, DIY Soutache jewelry can be expressed as a medium of creative fun.
Step by step procedure to design Soutache:
It could seem tough and a little intimidating when making Soutache jewelry, however, that is not the case. Once you get a hang of it, there would be masterpieces being created by you in a jiffy. From round pearls to cabochons, briolette pendants to Czech glass beads, all of these can be used to make the focal point of the Soutache embroidery more prominent and attractive, and they accentuate the design as well. The design process to create astounding Soutache embroidery and jewelry lies in the way the braids are curved back and forth around the beads chosen. It is a little tough to describe in writing how the jewelry making is done this way, and hence one has to visually check the same to learn more. Here is a video tutorial on making Soutache jewelry and we also have a step-by-step instruction description for the same as well. Check it out.
Accessories /Supplies required for Soutache:
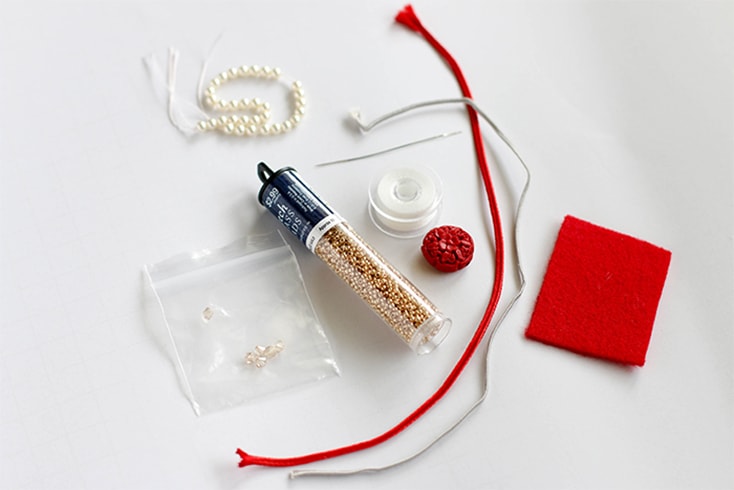
Materials needed:
- Soutache trim in red and gray- 6 inches
- Size 11/0 seed beads in gold color
- Light shadowed crystals – 2x4mm
- Swarovski white pearls- 15x3mm
- A carved center bead- 20mm
- Red felt piece
- Yarn
- Seed bead needle
- E6000 glue
The tutorial for beginners
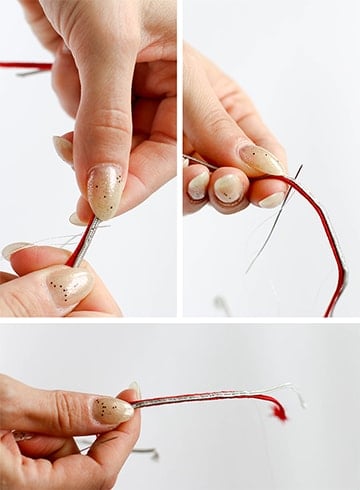
- Begin by sewing two pieces of Soutache trim together. It should always be sewed along the center to avoid fraying of the trim. The sewing should be done until a two-inch string is formed.
- Focus on the bead hole, which should be used now to attach to the trim. Doing so would give a strong and extra hold. Sew twice through for more stability.
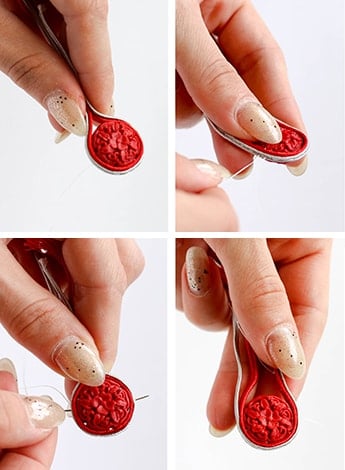
- Ensure that around the bead the trim fits well, and then go ahead and sew each of the ends together, which helps create a loop.
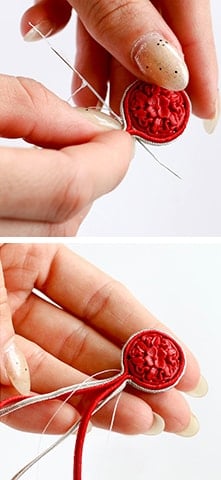
- One side of the trim needs to be sewed together for about 8-10mm. Now add the 4mm Swarovski crystal to the needle. Sew this crystal on and exit through the middle.
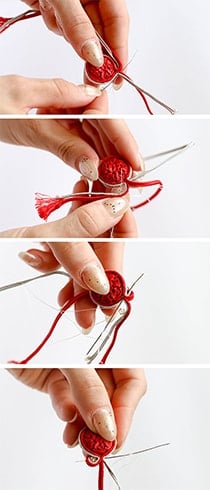
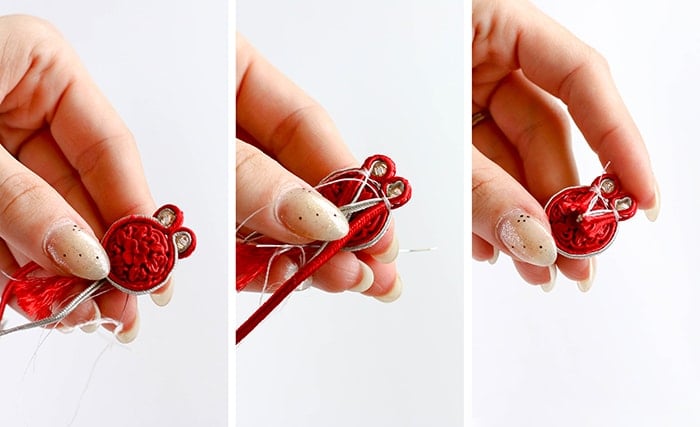
- Once you have sewed the crystal on, the excess trim which is at the back of the pendant needs to be sewed. In order to do this, you would need to fold the trim over and then sew underneath the trim and then over it. The process should be repeated on the other end of the trim as well.
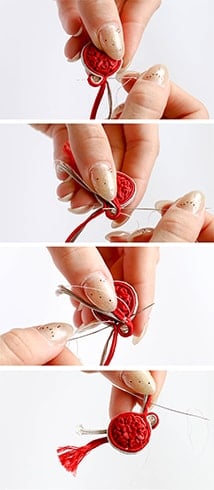
- Secure both the ends and cut it off. To bring the yarn off, sew through the back and bring it out to the front. It depends on the trim type that you use, where the fraying can be stopped with the help of a lighter. On this piece, the red trim is made from polyester, and hence with the help of a small flame, you can control fraying.
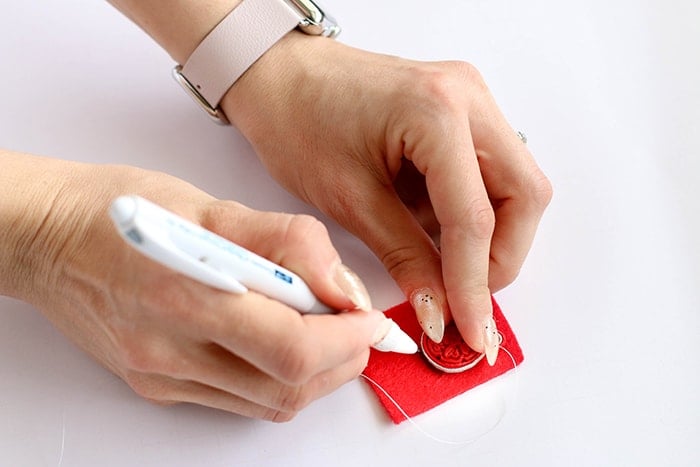
- Trace the pendant on the felt. Once the felt piece is cut out, you must glue it to the back of the pendant with the help of E6000.
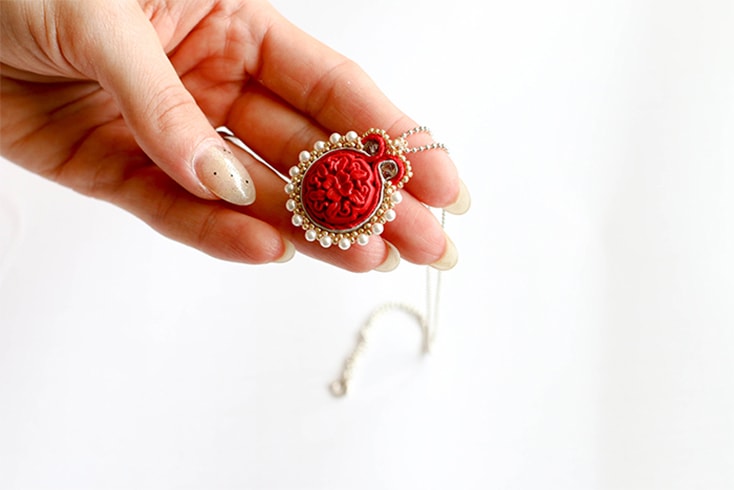
We hope you enjoyed reading this detailed tutorial on how to make Soutache jewellery. You can even try making your own Soutache jewellery, Soutache earrings, Soutache dresses once you get the hang of the Soutache embroidery technique. If you would like to try this on your own, go right ahead. Do write in and let us know if you found this article on this beautiful craft from Russia interesting and informative!
Images Source: oheverythinghandmade.com
