
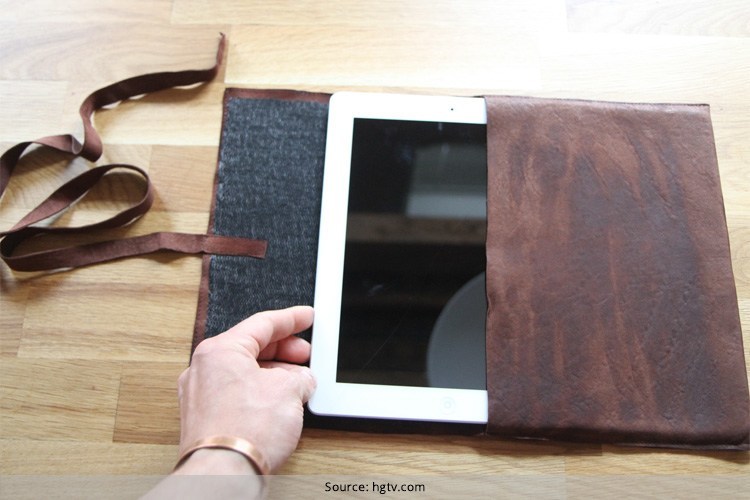
The iPad is one of your priciest possessions enabling you to use it as a mobile office and an entertaining console, apart from letting you stay updated round the clock. Hence the need to accord the expensive tab of a fool proof protection so that you can keep using it for years on end is indispensable. Yes, the iPad comes with a chic cover that heightens its overall look but enclosing it in a custom-built case will make it look more stylish.
Alternatively, a customized encasing crafted from recyclable materials will function as a spare cover adding an extra layer of protection to the gadget. The following how to make iPad leather case tutorials offer practical guidance on creating some exceptional covers for your Apple tablet from ordinary biodegradable household materials. These DIY iPad covers have extraordinary functionality and serve as a good fit for all generations of iPad.
MAKE YOUR OWN IPAD CASE

Getting Started
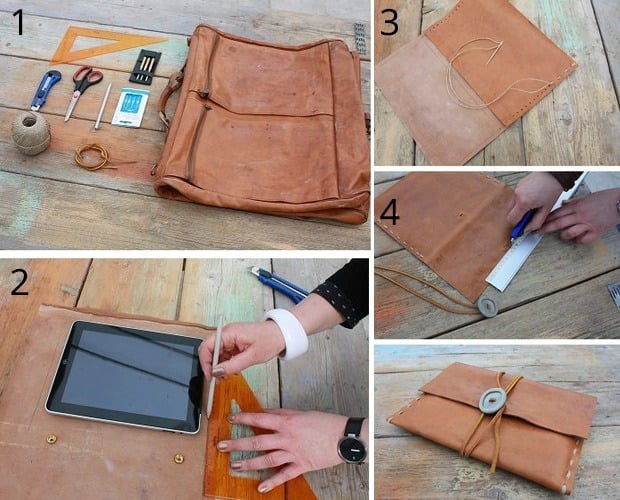
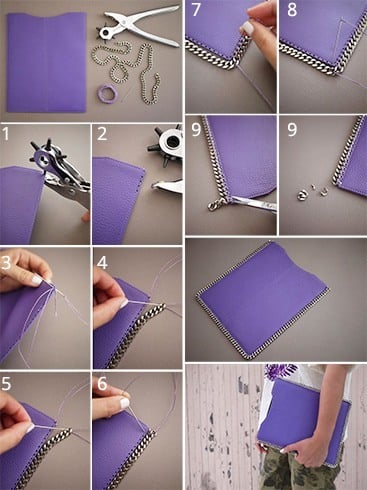
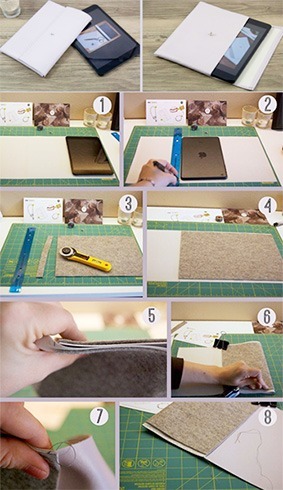
In order to get going with your how to make iPad leather case, you’ll basically need the following supplies or components-a single sheet of sizable leather scrap, leather hole puncher, sewing needle and thread for embroidering on leather, hammer, cardboard, scissor, knife and other knickknacks. You can source the leather scrap from any shop dealing in automobile accessories, including vehicle upholsteries. In case the scrap is not robust enough, you can always make it stronger.
Making or Taking the Measurements
The next step in designing in your own iPad leather case involves making or taking the base measurements. Take a ruler or scale and make markings of 17.5-18.5cm for the length and 12.5-13.5cm for widths. Leave 1cm from the edges, sides, and top for making holes without marking the base or the bottom.
Punching Holes and Embroidering
[Also Read: Ladies Leather Laptop Bag Patterns]
You’d need to do a good job with making perforations using a punch which means the holes should be uniform and consistent. However, you’ll not be required to learn cobbling or tailoring for doing the job as a leather puncher of commendable quality will be sufficient. For stitching through the holes, all you’ll need is a simple sewing machine. You could also consider imparting an eye-catching design by employing a running stitch technique using colourful threads.
After you’re done sewing the top edging or border, you’ll have to figure out where exactly the iPad will rest once you encase it. There should be a spacing of at least 11.75-12.75 inches between the top and base stitching lines. Make sure that the sewing is effective which will make the hide hug the iPad quite closely.
[sc:mediad]
Ensuring that the Frontend of the Case is Hard-wearing
Ensuring that the frontend of the case is tough is perhaps one of the most vital steps in the make your own iPad case. It is the front cover that’ll act as a shock-absorber protecting it from accidental bumps and prevent your tab from taking on scratches or grazes. Cut off the top part of the container in which your iPad was delivered, and place it over the appliance and make a cut-out slightly larger in area than the device.
[Also Read: DIY Leather Bag Patterns]
Slot in this cut-out inside the front part of the cover. In order to prevent the iPad from coming out and falling off, a flap will have to be made that’ll fold over the contrivance. Create a cut-out by knifing the cardboard, make a fold, and check out the fitting. You could make the inner side of the casing tougher by inserting a sheet which you can craft from the leftovers of the leather scrap.
Creating the View Window and Trimming the Cover
Have the dimensions pencilled out at the outset when you marked out the measurements in the 2nd paragraph. Measurements for the iPad’s screen should not exceed 10”x 8” in any case. Glue up all the cut-out frames using a superior quality adhesive, and let the glue to dry up fully so that the sheets stick to each other firmly.
[Also Read: Laptop Bag For College Girls]