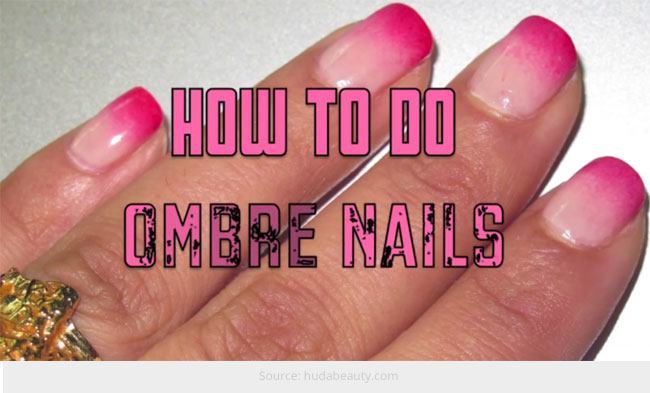
Let me confess, every week I go through an obsession phase for fashion and makeup. While last week I was obsessed with eye makeup, trying out almost every possible style that I once thought was complex; this week I am obsessed once again, but with nail art. While I have already tried upon an array of floral patterns and galaxy designs earlier, this week I have been experimenting with ombre nail art patterns with different shades and texture. In this post, I’m going to share a few tips on how to get ombre nail art design. Read on to find out how!
It’s about time, the girly floral designs go on a break for a while and instead, I though why not go for some swanky yet romantic patterns. The ombre nail art gives you ample freedom to play with both subtle as well as bold shades and create your own magic on your nails.
While for flower nail art, you have to master the dotting technique, for ombre nails you’ll have to play safely with the sponge. Even though this design can be obtained faster than any other nail art designs, the only time consuming part here is that you’ve to transfer your desired shades to sponge and then to your nails. And this transfer technique requires practice, as you do not want them being smudged.
[Also Read: Summer Nail Art]
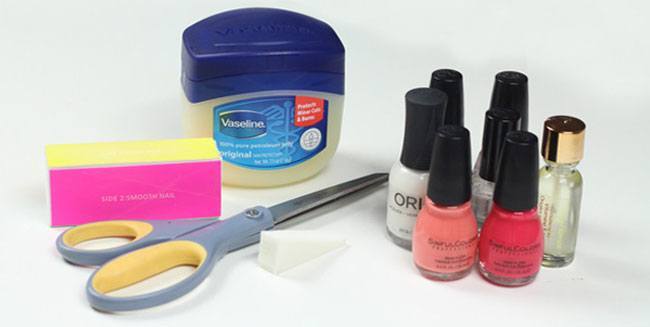
Supplies you’ll need for ombre nail art –
- A base coat – you can go for something in white, as the white shade helps other shades pop. Plus, it also helps the ombre nails stay longer
- A white nail polish – Do not go for a white polish that is thick, or else try applying a thin coat
- Three coordinating paints and again they depend upon your mood. My best baits include Thimbleberry and Easy Going Hazard from Sinful Colors
- A top coat
- Makeup sponges
- Scissors
- Vaseline
- Cuticle Oil

Source: twistmepretty.com
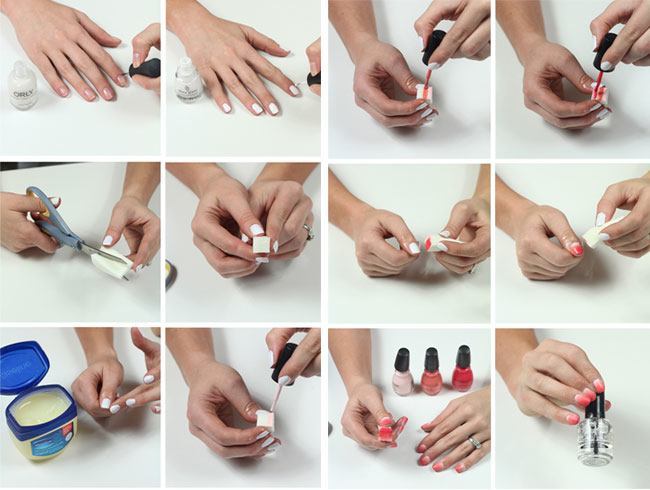
Here is a step by step tutorial on how to do ombre nails –
[sc:mediad]
- Firstly, apply the base coat and wait till completely dry
- Now after the base coat is dried, apply a fine coat of white nail polish and again let your nails dry
- Either take a small makeup sponge or cut one to smaller size that fits on your nail
- Apply Vaseline around your nails, so that the colors come off easily from your skin later on
- Now get your three shades ready and apply a strike from each shade over the sponge. Make sure you go from light to the darkest i.e. lightest then darker and darkest on the top
- Now carefully blot the sponge onto the nail and keep slowly dabbing it until the entire nail is covered
- Once you are done with all the nails, allow them to dry
- Finish your ombre nail art with a top coat so as to ensure the design stays longer
- Now remove the extra polish around your cuticles, with a nail polish remover. You are done with your ombre nail art design

Source: twistmepretty.com
Hope this step by step tutorial on how to get ombre nail art design gives you some inspiration!
