Santa is back this year with the concept of a fairyland. And by that we mean jingle bells dangling on the trees, loads of gifts, holiday parties, playful snowflakes, hummable songs, yummy chocolates, festive treats, plum cake and some nail-biting adventure!
[Also Read: Breathtaking Christmas Nail Art Designs]
Yes, with Christmas around, it has to be a nailicious experience filled with freaky designs and festivities. How are you going to amp up the holiday spirit? We’ve got some fantabulous looking Christmas Sweater Nails for you that will make you drool.
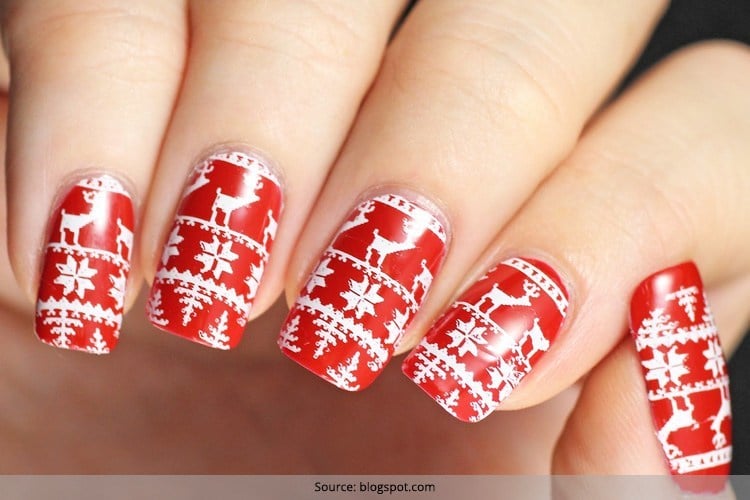
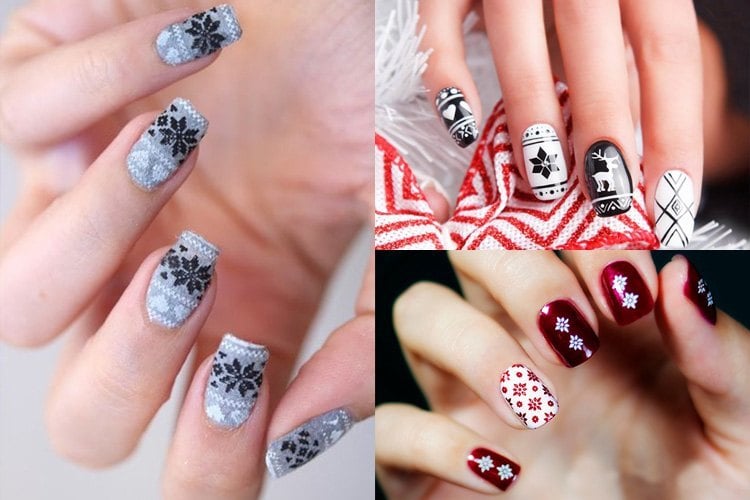
Sweater Nail Art is a trend that is fast catching up with the fashion-conscious girls and celebs. It lets you experience the joy of cable knit texture on nails, almost aping the designs found on the sweaters.
Christmas Sweater Nail Designs
Now get dressed in your favourite christmas dress, grab a hot mug of cappuccino and sit back with your friends to enjoy the christmas sweater nail designs that will make your Christmas celebrations awesome and fab. Here we go.

How do you go about making the Christmas icons on your nails? Just imagine your favourite Christmas symbol, put it on nails and there you are with the super duper Christmas nail art.
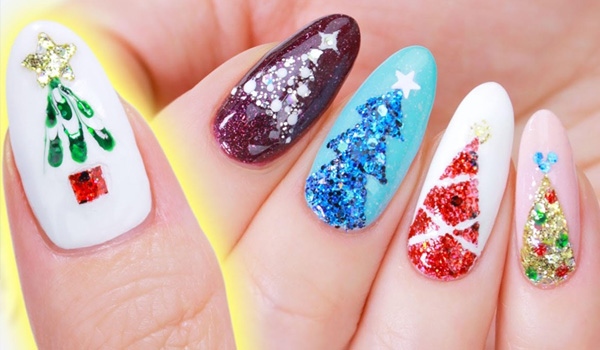
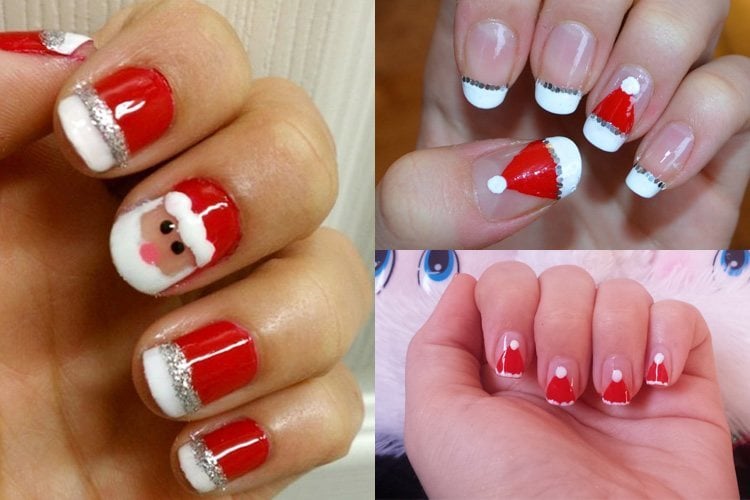
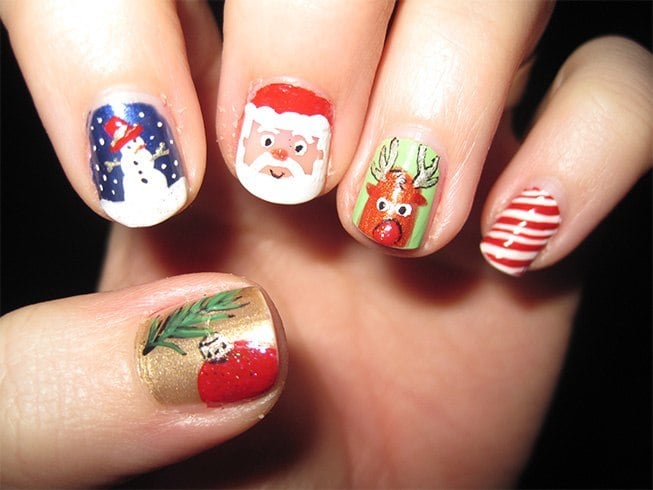
Some of the most loved and happening symbols used on nails include snowflakes, Santa Claus, Santa’s deer and Christmas decor leafs.
Though red, green, white and blue are the most used colors for christmas sweater nail designs, you can even use other nail polish colors. Ah yes, there is glitter polish too when it comes to making swanky Christmas nail designs.
Excited to find out how they look? Here’s a look-see at simple christmas nail designs that will floor you with their simplicity and design quotient. Go ahead, have a blast with Christmas Sweater Nails!
Santa Hat Nail Art
Cute Christmas Nail Art

[sc:mediad]

Materials Required For Christmas Nail Art
- Red Nail Polish
- Gold Glitter Nail Polish
- White Acrylic Paint
- Striping Tape
- Striping Brush
- Dotting Tool
- Swarovski Crystals
- Brush on Nail Glue
- Top Coat
[Also Read: Christmas Nail Art Designs for Beginners]
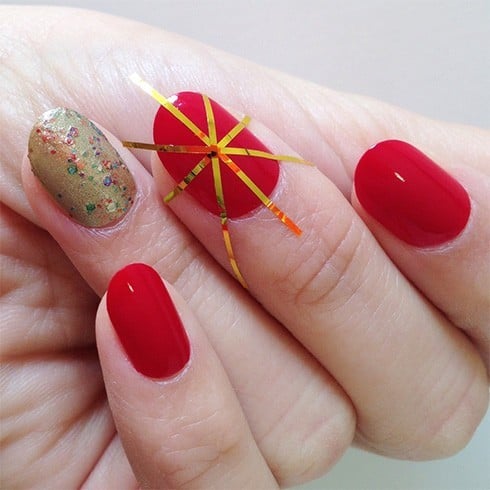
3. Now take white acrylic paint and striping brush. Try and use acrylic paint and not white nail polish since the acrylic paint is far easier to control when you are painting in a detailed fashion.
To get the required effect, you need to paint a V shape pointing from the center of the nail to the top in an outward fashion. Once done you then need to fill in the V’s with a bit more of white acrylic paint. Now let the drying happen.
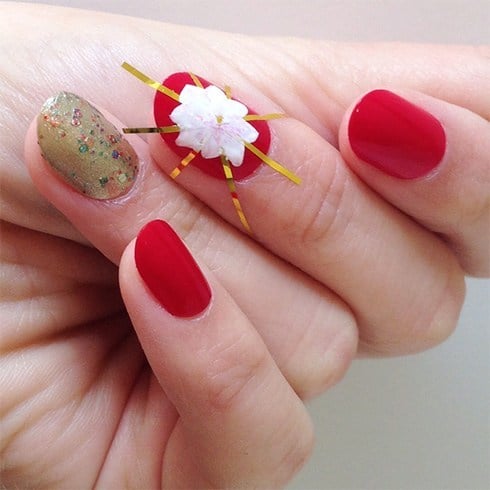
4. Once the white paint dries up, peel off the striping tape. Yipee! You will witness Christmas nail art looking white poinsettia leaves.
[Also Read: Fake Nails Designs]
Now brush a small dot of nail glue in the centre of the leaves. To pick a gem, use a dotting tool which is dipped in top coat and then place it in the centre of the flower where you had put your nail glue.
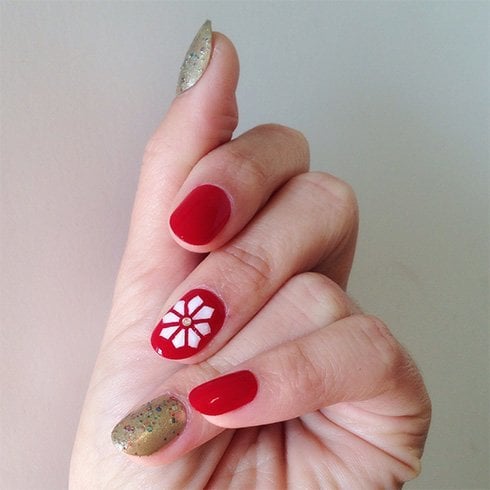
5. Apply the same technique over your balance ‘red’ nails. It means you need to use white acrylic paint and striping brush to paint stripes in a horizontal fashion across the nails.
In between the stripes, use a dotting tool dipped in white acrylic paint to position white polka dots in between the stripes.

[Also Read: Types of Manicures for You to Try]
The most creative way of doing Christmas Sweater Nails is to replace one of the white polka dots with a Swarovski crystal. Howzatt!
Let your white paint dry first. Then apply a thick top coat to all your nails so that the colours get sealed and the gems are firmly held and secured in place.
But most of all, hang on for a few minutes before you apply top coat over your white paint. Why because if it is still wet, then the top coat will end up dragging all the paint and smudging your hard work and time.
With such a wide variety of Christmas nail art shown, replicating these patterns over your nails or on your best friends’ nails becomes so much easy and enjoyable.
Tell us which of the christmas sweater nail designs you are going to wear this season. By the way, have a nail-dazzling warm Christmas. Cheers!
Images Source: pinterest
