
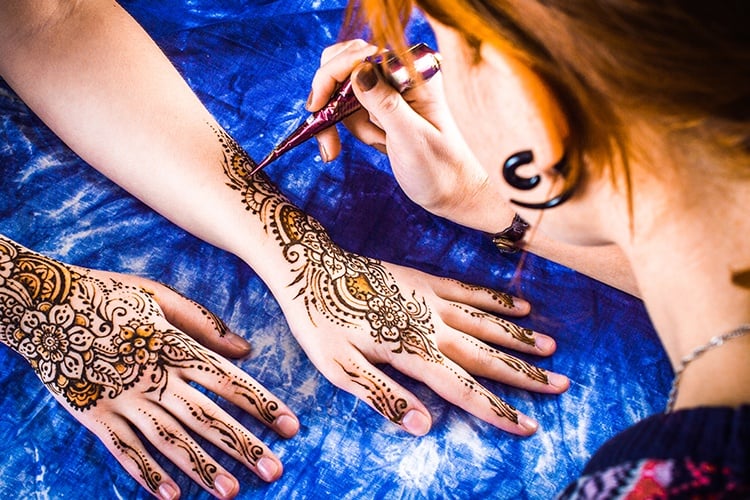
Henna (mehndi) is basically an herbal dye that is powdered and when applied on skin gives cooling effect. Simple mehendi designs are worn by women and young girls during auspicious festivals and occasions such as Diwali, Karva Chauth, and so on in the Northern states of India. And, those who love elaborate ones, generally prefer wearing these for family weddings or as a bridal mehendi for themselves.
What used to seem as a very difficult task, to make the mehndi paste, fill a cone and then apply, has become much easy and simple with the ready-made mehndi cones available in the market these days. Now women enjoy applying mehndi on their own hands and others for either festivals, get-together or just has become a part of their hobby.
For those who have always wanted to learn this how to apply mehndi step by step, we have some good news for you. After reading this article on how to apply mehndi designs for beginners, you will look for an empty hand to try and practice this mehndi art.
How to Start?
Always begin with small designs. Simple mehndi designs such as making leaves, veils, flowers need to be practiced and mastered before going into the elaborate and beautiful mehndi designs including peacocks, dulha – dulhan, lord Ganesh, and so on.
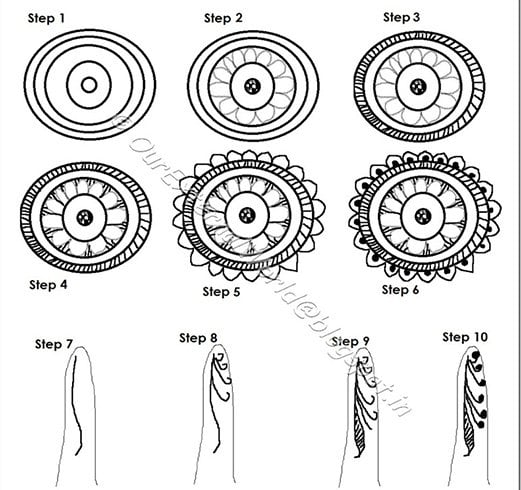
In this post on how to apply henna designs step by step, we will cover the easy yet impressive henna design tutorial. Go through the tutorial and get some cues to unleash your creativity.
To learn the step by step mehndi designs, you need:
- Henna mehendi cone
- A printed copy of Henna design
- A clear plastic sheet
- Tissue paper
- Glitter cone (optional)
- A4 sheet or plain piece of paper
- Pencil
Source: letscreatecrafts.com
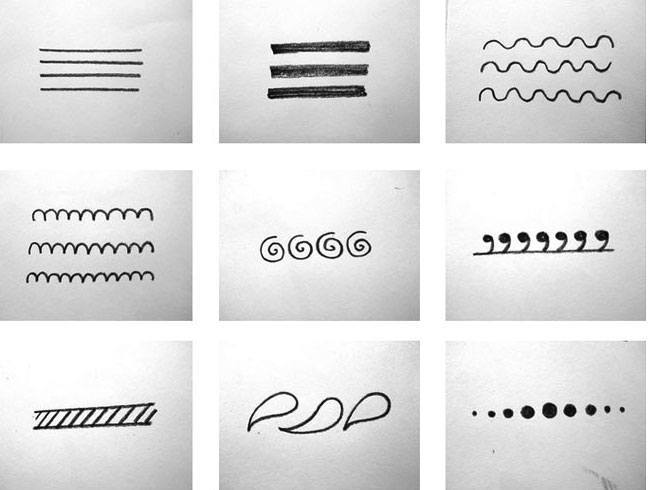
Beginners should first go through the simple basic shapes that are used in the simple henna designs by following step by step mehendi designs tutorial, like we have just suggested. Once they are aware of these basic patterns, they can make use of them in intricate bridal mehndi designs and for other functions as well.
[Also Read: How to Darken Henna on Hands and Feet]
Whether it’s a simple curved branch with leaves, bud designs or the gota patterns, you should remember these easy designs. While it takes time to obtain a fair hand in intricate designs, you can always start with the simple henna or mehndi patterns and with practice later on you can go for intricate Arabic henna designs.
Source: letscreatecrafts.com
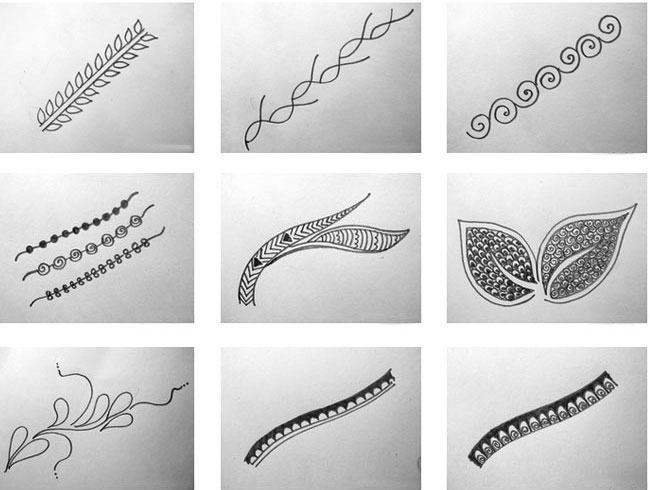
In order to start with any kind of mehndi art or design, you have to learn the art of drawing leaves and vines. The below collage of patterns can give you some basic ideas to learn from.
[sc:mediad]
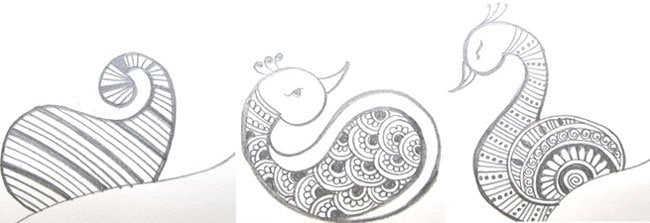
How to draw peacock design using mehndi
After you have practiced the leaf and vine designs, now you should start working on the peacock design, which is essential in the art of henna. Follow this peacock henna step by step tutorial to learn how to do henna.
Peacocks are one of the most beautiful henna designs which add elegance and charm to the body art. Go through these image tutorials to easily learn how to draw the outlines and also the elaborate patterns within.
With basic henna designs mentioned earlier in the post, you can fill in the body of the peacock. However, always make sure to carefully draw peacock’s eye and beak to create natural effect. For fingers, you can either go for checkered designs, floral patterns or simple vines. You can make bigger or smaller peacock designs with mehndi. Fill it up according to your wish. You can make small flowers or add checks to fill the peacock.
Source: letscreatecrafts.com
Some tips to follow:
- In order to check if your skin is allergic to your skin, you can apply a small amount on your hand before starting with the step by step henna design
- If you’ve done waxing on your hands, then wait for a day or two before applying henna. As pores are opened and the chemicals present in henna might enter through open pores
- The color of the henna is different on palm and on skin. While it is darkest on palm, it appears to be lighter on hands. It only get darker after one or two days
Here are some more images of simple henna designs. Use the above mentioned techniques on step by step henna application, and keep practising different shapes and sizes of motifs that you love.
For those starting out, first begin with simple strokes and basic shapes as shown in the simple mehndi designs above. Replicate the simple mehndi patterns step by step. Once you have learnt how to create these basic patterns, then you can move on to making intricate mehndi details.
Hope this post on how to apply henna mehndi designs step by step tutorial helps you in becoming a pro! Once you have mastered the designs mentioned in this post, do not forget to read our article on 20 mehendi designs for beginners. This will be the next big step for you.